
Originally appearing in the July 2017 "How-To"-themed issue of Model Aviation, which was sponsored by Du-Bro, these tips from contributors and readers are still relevant in 2026. Hopefully they will provide you with some useful ideas or teach you a new skill or two to help you get into the air successfully!
Make sure to also visit the AMA YouTube "How-To Issue" video playlist for more tips, tricks, and tutorials. The link is listed in "Sources."
Raised Rivets
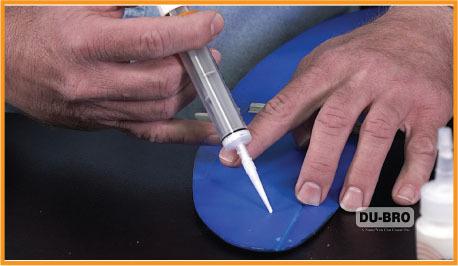
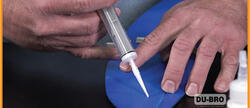
There are many ways to add scale details to a project, including rivets—lots of rivets. One favorite way to add raised rivets is with a syringe and canopy glue. Using a syringe and an 18-gauge needle with the sharp point cut off allows you to control the size of the rivets.
Making Seat Belts for Your Model
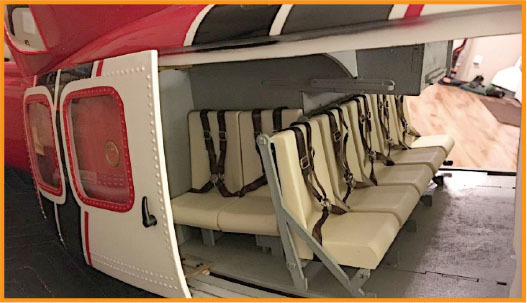
For Scale enthusiasts, adding a figure is nice, but every pilot and passenger should also have a seat belt. There are some available online, but they can be costly, and if you need more than one, you could be dishing out some money.
An example would be this Scale 800-size helicopter that just didn’t look right without them. With some cheap ribbon, bits of jewelry pieces from a fabric/craft store, white glue, a simple jig, and a little soldering, the builder’s helicopter was given some custom-made, nice-looking, detailed seat belts.
Soldering a Connector
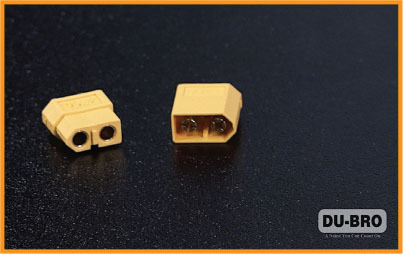
After soldering an XT-60 battery connector to a new battery, the modeler found that it couldn’t be connected to the ESC’s connector. What happened? During soldering, the heat softened the XT-60’s case and the pins moved enough so that it couldn’t be plugged into the ESC’s connector.
The solution? Before soldering the XT-60 connector to the battery leads, plug it into a female connector. That will hold the pins in place during soldering and the XT-60 connectors will then plug together as they should.
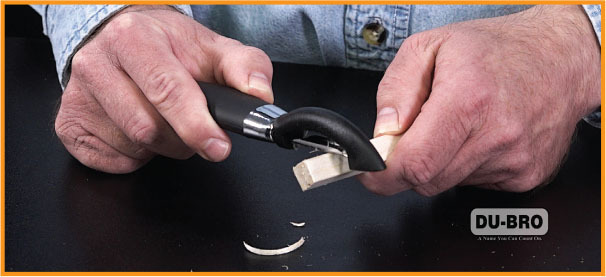
Hand Planer
One modeler has used an old-fashioned potato peeler as a hand planer to shape balsa into leading edges for years. It works better than anything that is commercially produced. When it gets dull, throw it away and buy a new one for cheap at the dollar store.
Collet Propeller Adapter Wrench
Some collet propeller adapters are perfectly circular and do not have two flat spots that can be used to grasp them with a wrench. If you’re having trouble holding onto a collet propeller adapter while threading on a new propeller or removing one that is broken, take a short strip of the foam rubber that you would wrap around a receiver or other electronics, place it in the jaws of a good set of pliers, and then use the padded jaws to grasp the collet propeller adapter. This usually provides an effective grip without the damage that can be caused by using pliers without foam rubber padding.
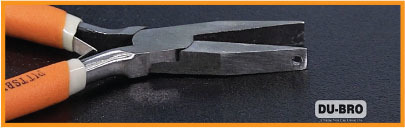
EZ Connector Pliers
To help seat EZ connectors, drill a hole in one side of a small pair of flat-nose pliers. Start seating the plastic (or metal) clip manually then use the modified flat-nose pliers to finish the job. It helps if the servo arm or control arm is removed then reinstalled after the connectors are added.
Removing Epoxy From Your Hands
To get 5-minute epoxy off your hands quickly, easily, and safely, use apple cider vinegar. It works in 2 minutes with no harsh chemical smell or burning.
Installing Blind Nuts
Here’s an easy way to avoid frustration when you’re installing blind nuts in areas that you cannot reach, such as the inside of the nose of an airplane.
Insert a threaded rod that matches the thread of your blind nut through the hole from the outside. Thread the nut a little way onto the rod then pull the rod out so that the blind nut is at the hole.
Thread a washer and a nut from the outside of the airplane and tighten it down while holding the rod to keep it from turning. The nut pulls the blind nut into the hole and seats it. You can then loosen the nut and remove the rod.
Handy Sanding Stick
An emery board kept in your flight box makes a great small sanding stick!
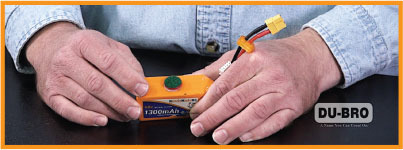
Charged Battery Notification
Wrap rubber bands around a fully-changed LiPo battery for a better grip. After use, remove the rubber band as an indication that it is no longer fully charged.
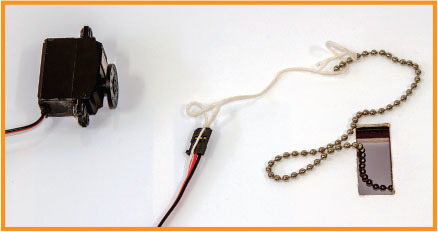
Fishing Servo Extensions Through a Wing
Most ARFs on the market today have strings inside the wing halves to help pull the servo wires through them, but sometimes they don’t. When that happens, what is an easy way to pull the servo wires through?
Go to the local hardware or big box store and buy a couple of different sizes of pull chains for ceiling lights. Approximately 4 feet of chain is more than enough to go through most wing halves.
Tie a string to one end. Holding the wing panel vertically, start to feed the end of the lamp chain (without the string) through the servo opening. The chain will easily find its way to the other end. When it is there, simply pull a piece of it through the opening where you want the servo plug to be placed. Tie the string to the servo plug and begin to gently pull the other end of the lamp chain. The servo wire will work its way through the wing panel behind the chain. If it hangs up, try shifting the position of the panel or giving it a slight shake.
Keep working the servo wire through until it exits at the root of the wing panel. Remove the string from the servo plug and secure the servo to the wing in the usual fashion. Mission complete!
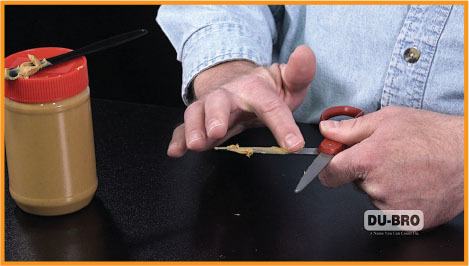
Cleaning Scissors
Here’s a tip if you build foam board jets and use lightweight 3M strapping tape for hinges on the control surfaces.
After using scissors to cut the hinges to size, glue from the tape can build up on the blades and make them almost unusable. If you don’t want to use chemical cleaners, simply use peanut butter. Smear a little on the blade and work it into the glue then use a paper towel to easily wipe off the built-up glue. The solution works like a charm.
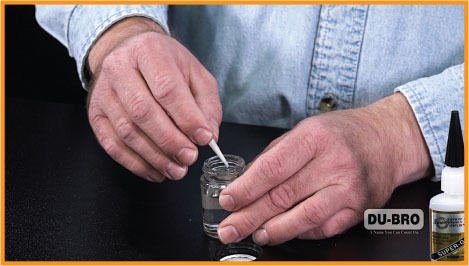
Keeping CA Tips Clean
Place your CA glue dispensing tips in a jar of acetone—it should have enough acetone to cover the tips. You can place spray-can tips in acetone as well. The acetone dissolves the CA and/or paint and makes the tips usable the next time you need them.
Because acetone evaporates easily, even with a seemingly tight lid, put some plastic film on top of the jar (like the plastic backing from covering); this helps seal the jar better.
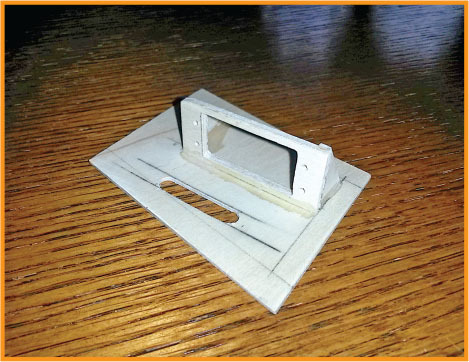
Servo Mounts
To prevent a servo from hanging out in the breeze, build your own wing servo mount/cover to hide it in a wing.
The basis for the mount is a plywood rectangle cut out in the center for your servo of choice. Use a downward-cutting spiral bit in a drill press, set to its highest speed, and guide the bit by hand. Take your time; you can always clean up the edges with a file or a small sanding block.
The top (cover) side of the mount can be sanded to match the curve of the wing so that the cover gives a perfect fit. Two small triangles of plywood stabilize the servo mount on the cover. The mount/cover in the photo is for a servo in a fairly thin wing, so it is relatively compact.
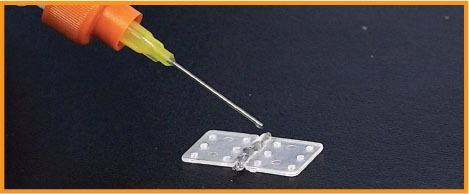
Hinges
When pinned hinges are installed on control surfaces, the glue sometimes gets in the hinges and causes them to bind. Before installing hinges, simply put a small amount of light oil right on the hinge line. Be sure not to let the oil spread to the part of the hinge that you are going to glue. This will ensure that the hinge will not bind after the glue dries.
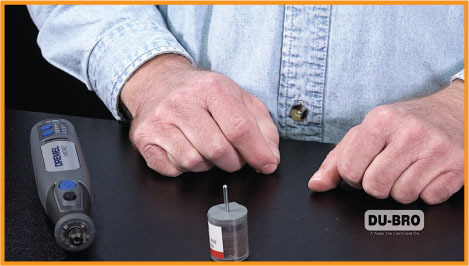
Cutoff Wheel Storage
No matter how careful you might be, brittle Dremel cutoff wheels sometimes break when you’re done using them. Solve this by drilling a 1/8-inch hole in the plastic cap of the cutoff wheel container then simply return the partially used wheel back to the container that is still mounted on the shaft, with the shaft sticking out of the hole and the cutoff wheel protected inside of the container.
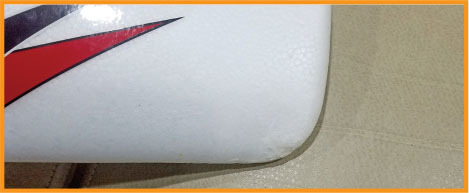
Adding Color to Epoxy
When you are making repairs, especially on Styrofoam airplanes, mix one drop of resin pigment into epoxy glue to color the adhesive to match the repair area. This helps to make the repair nearly invisible. You can also add one drop of white pigment into your epoxy mix to fill in little dings and dents on foam aircraft.
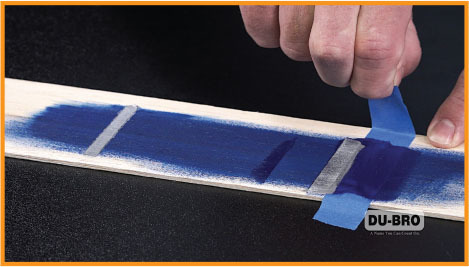
Eliminate Paint Bleed Under Masking Tape
After applying masking tape over a base color, seal the edge of the tape by painting it with the same base color. Now apply the second color. Removing the tape will leave a nice, sharp edge because any paint that seeped underneath the tape will match the base color. If the base is unpainted, covering film is used, or you do not have matching paint, use clear paint to seal the tape line.


Comments
Add new comment