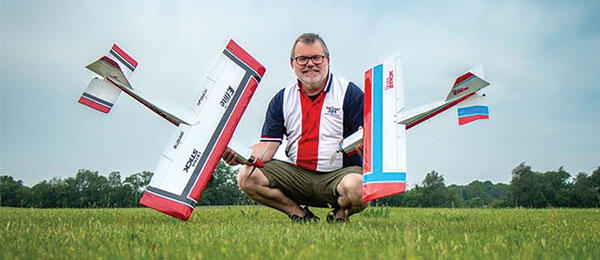
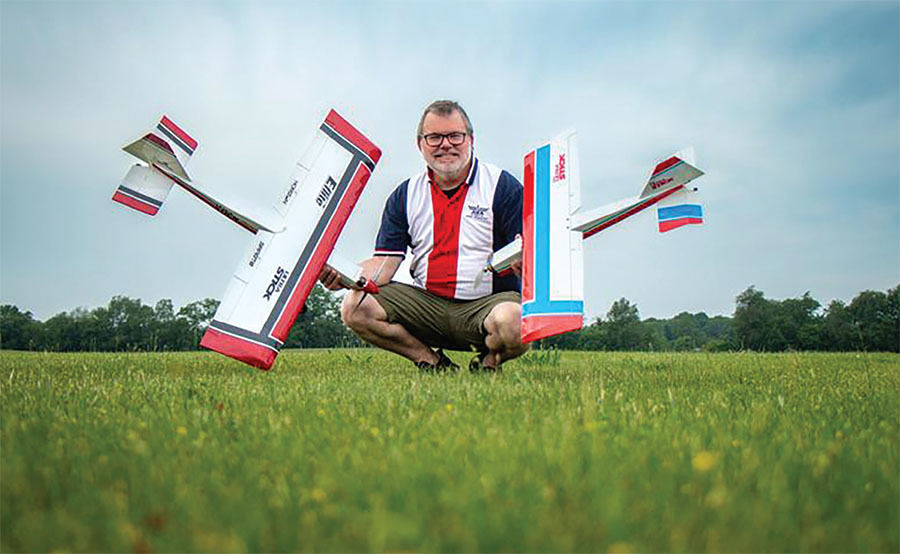
Revisiting a favorite aircraft
By Jay Smith and Fitz Walker | jays@modelaircraft.org; flying_fitz@yahoo.com | Photos provided by the authors
As seen in the August 2025 issue of Model Aviation.
HAVE YOU EVER had a model airplane that you really enjoyed but at some point, you got rid of it to thin the herd a bit and, shortly thereafter, you regretted that decision and wished that you still had it?
For me, that aircraft was the Mini Ultra Stick. I was working at a hobby shop at the time and managed to get one of the first three we received. The Mini Ultra Stick was E-flite’s first-ever "wood" PNP and ARF model that became an instant bestseller when it was released in 2005. It was available for more than a decade and is still iconic to this day because it goes together as easily and as quickly as foam PNP models, yet it offers the advantages of lightweight, stiff, and strong wood construction that delivers flight performance unlike similar classes of fully molded EPS and EPO foam models.
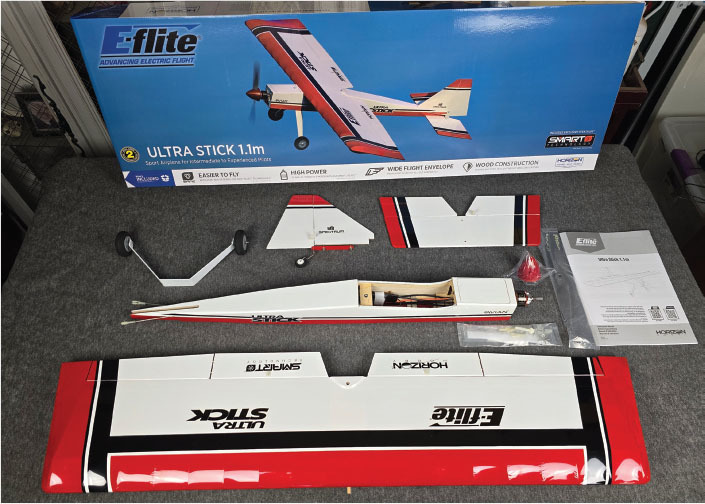
The Ultra Stick 1.1m is an updated and upgraded version that is slightly larger to offer even better flight performance with extremely popular and common 3S or 4S 2,200 to 3,200 mAh batteries.
I was excited and immediately interested in adding the Ultra Stick 1.1m to my hangar. The original was super easy to assemble, but the latest version takes it a step further with the radio gear, ESC, and motor preinstalled. Similar to the original, this aircraft would be ideal for someone who wants their first balsa model after learning to fly with a trainer aircraft.
Before I began assembling the aircraft, I accessed the Spektrum Preset Model Files and downloaded the proper one. I put the file on an SD card and downloaded it to the radio. This definitely saves some time and can be really helpful if someone is new to programming a Spektrum radio.
Assembly
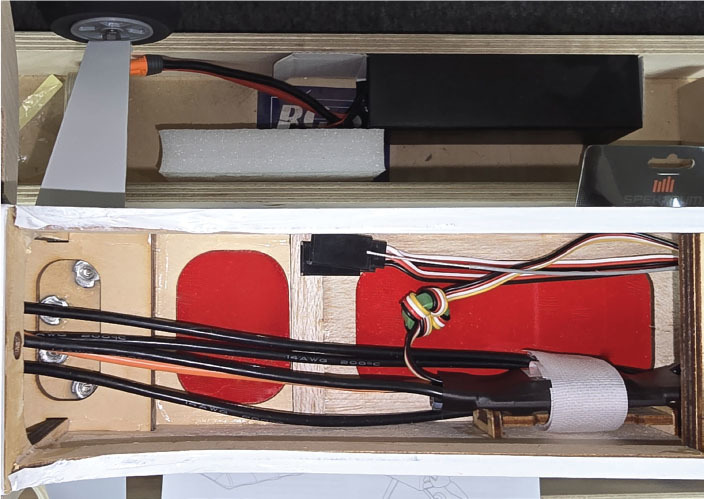
The model came out of the box with the covering looking great. Upon inspection, I found that the plywood mounting tray for the ESC inside the fuselage had come loose in shipping. I removed the old glue and used thin CA to reglue it to the side of the fuselage.
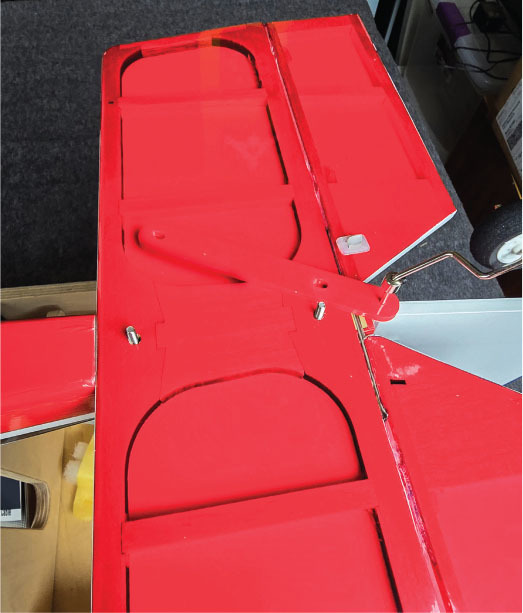
The assembly is incredibly simple. If you choose not to add two servos for flaps, you don’t even need any glue. Begin by installing the vertical stabilizer from the top of the fuselage, leaving the M3 mounting studs protruding through the bottom of the fuselage. Attach the horizontal stabilizer, noting that the control horn should be facing up on the side opposite the rudder control horn (left side of the fuselage).

At a Glance
Specifications
Model type: Sport
Skill level: Intermediate
Wingspan: 43.31 inches
Length: 39.1 inches
Weight: 31.7 ounces without battery
Radio: Six-channel radio recommended
Construction: Balsa with iron-on covering
Price: $359.99
Pluses
- Easy to assemble and easy to fly.
- Option to add two more wing servos to utilize crow and/or flaps.
- 3S and 4S battery-capable out of the box, between 2,200 and 3,200 mAh.
- Metal-geared servos.
Minuses
- ESC plywood mounting tray inside the fuselage came loose during shipping.
Manufacturer/Distributor
Horizon Hobby
www.horizonhobby.com
Slide the fiberglass tail wheel bracket over the vertical stabilizer mounting studs, add a 3mm washer to each stud, and secure them in place with M3 nyloc nuts using a 5.5mm nut driver. Slide the collar in place against the fiberglass tail wheel bracket and tighten the M2 setscrew with a 1.5mm hex driver. The entire tail is mounted on the aircraft with the tail wheel in place!
The landing gear is next. It is completely assembled and only needs to be attached to the fuselage. It can only attach one way. Align the landing gear mounting holes with the holes on the bottom of the fuselage then use a Phillips screwdriver (PH#1) to secure the landing gear in place with four M3 × 12mm screws with lock washers, being careful not to cross-thread the screws.
The aircraft has a hatch on the bottom of the fuselage to access the receiver, the rudder, and the elevator servos. You will need to press the bind button on the receiver to bind it to your transmitter. After this was completed, it was time to attach the wing and adjust the pushrods for the ailerons, elevator, and rudder. The wing is attached using a thumbscrew, so no tools are required. The area of the wing through which the screw passes is reinforced.
The last step is to attach the propeller and spinner, and then check the center of gravity. With the 4S 2,200 mAh battery, it was not an issue to balance the airplane as recommended.

Flying
The Ultra Stick’s initial flight was made with a 3S 2,200 mAh battery pack. Taking off from pavement, the Ultra Stick tracked like an arrow with almost no rudder input needed. Applying leisurely elevator input, it was up and flying in less than 40 feet. This distance can be seriously reduced with more aggressive elevator input.
After it is up, it’s immediately noticeable by the steep climbout that the model has both a light wing loading and more than adequate power with the stock propeller. It was also apparent that the default transmitter settings have sensitive roll controls. Even on low rates, the full-span ailerons are quite sensitive. On high rates, expect a blindingly fast rolling speed. Rudder and elevator throws were fine and not overly sensitive.
Flight speed is decent but not excessive. Exploring the flight envelope a bit, I found the Ultra Stick to be very stable thanks to the AS3X stabilization. With SAFE mode enabled, it still maintained good maneuverability while limiting any excessive bank angles. The fun really happens when you turn off SAFE mode.
Stick-type aircraft are known for being excellent sport aerobatics models. This Ultra Stick is no different. I had great fun putting it through its paces with various maneuvers. I felt quite comfortable with the usual loops, snap rolls, and stall turns. I noticed some minor quirks, including snap rolls to the right are noticeably faster than to the left, and spins to the left are faster than to the right.
It will do knife-edge flying quite well, although there is not much reserve rudder at anything less than full throttle. Vertical climb is nearly unlimited, with enough reserve thrust to maintain a vertical hover. Stability while inverted is really good, with nearly zero input needed on the elevator to maintain level flight.
At the other end of the speed envelope, the Ultra Stick can fly quite slowly without the fear of falling out of the sky. In fact, it doesn’t really stall with the wing level. It just "mush-descends" with full up-elevator at a rate slow enough to land that way without damage. It’s a mild, easy-to-fly model when you back off the throttle.
Flights with a 4S, 2,200 mAh battery are much the same, except that there is a great boost in power. Vertical climb is greatly improved, while horizontal speeds turn the Ultra Stick into nearly a pylon racer, where you can yank and bank with wild abandon.
On landing, expect the model to hold in a bit more momentum than you would expect. The normal landing approach works fine, but I found that to help avoid overshooting, it’s better to make your final approach with a slight nose-up attitude and regulate the descent using the throttle. Doing that made for more accurate spot landings. which the Ultra Stick can do on a dime.
Conclusion
The E-flite Ultra Stick is just as fun now as it was 20 years ago! I won’t make the mistake of getting rid of this one! Its size is perfect to fit in any vehicle for an enjoyable day of flying, and with the addition of AS3X, it will comfortably fly in windier conditions than the original. SAFE mode allows you to become comfortable with this classic model before exploring all of its flight characteristics.
SOURCES:
Spektrum RC


Comments
Add new comment