
The right gear makes all the difference
By Fred Randall
Photos by the author
As seen in the September 2010 issue of Model Aviation.
My big de Havilland Chipmunk from FlyBoy Models made a long, shallow approach and touched down on our grass runway. It made a slight hop, as was usual because of its short, stiff main landing gear, and settled into a long rollout. It had almost come to a stop when the left wing dropped and the big model slewed left and halted.
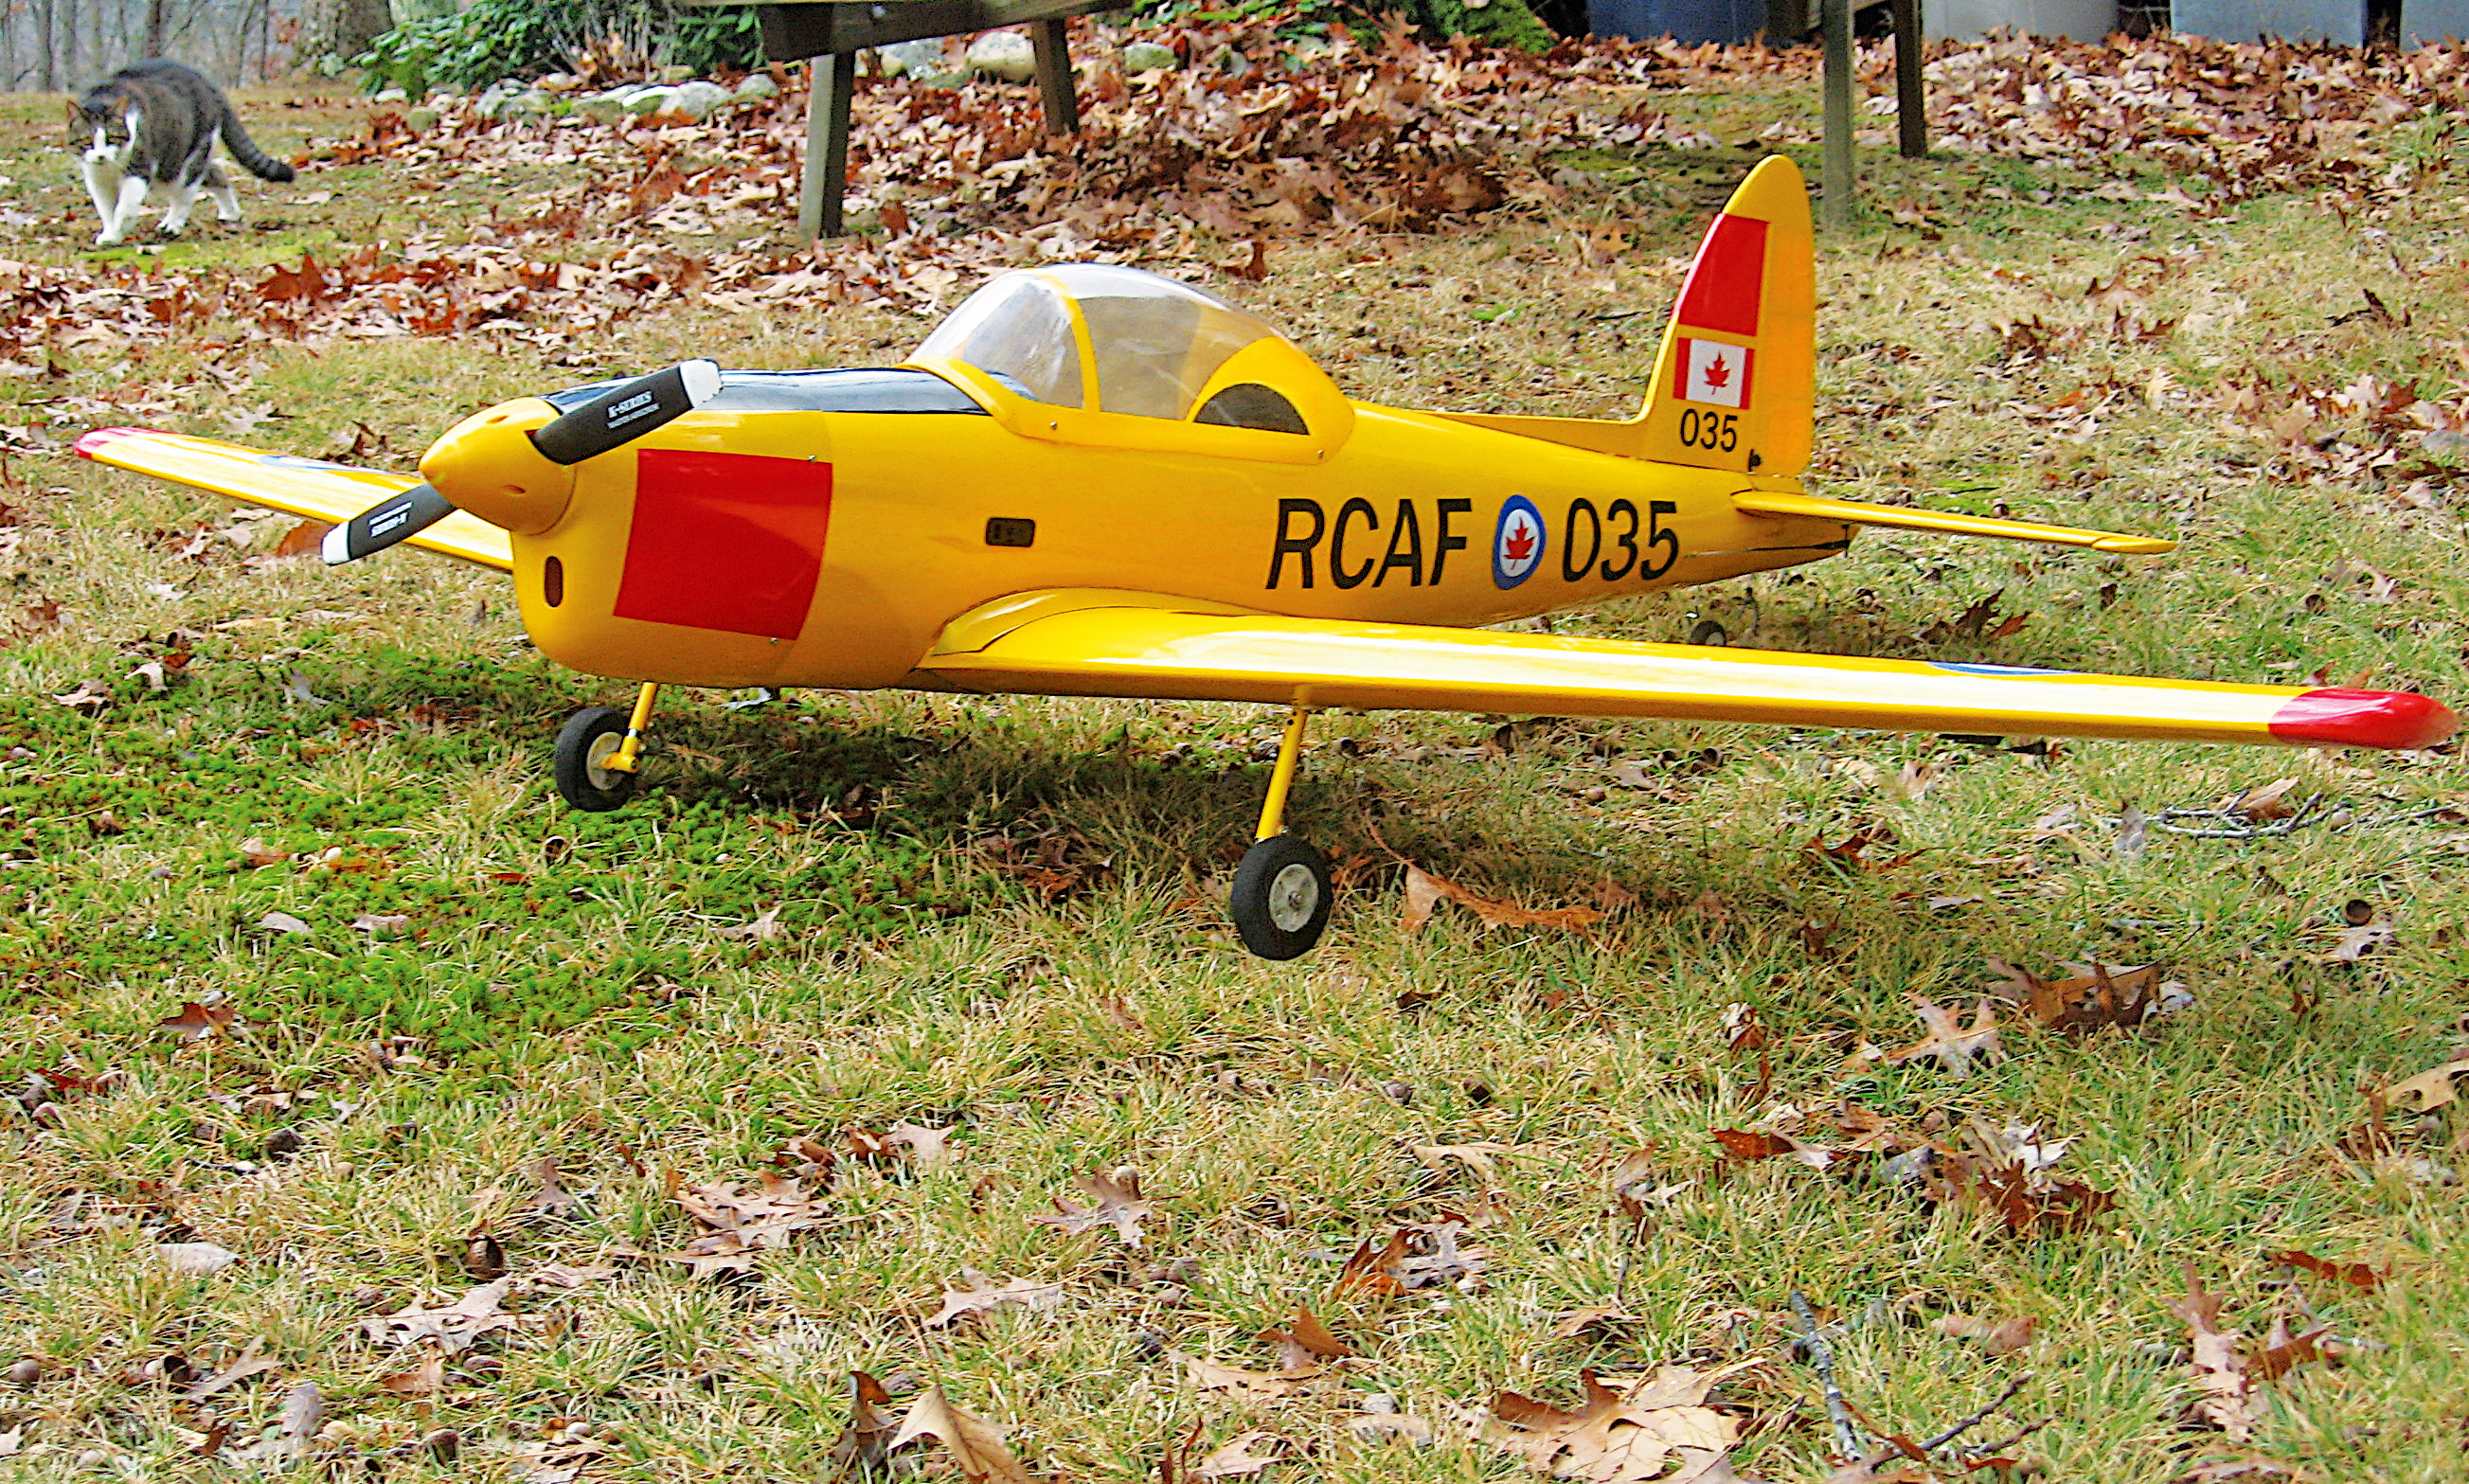
I uttered an epithet and then headed downfield to retrieve “Big Bird,” as I had come to call the yellow airplane. I suspected that it had encountered one of the many gopher holes at the far end of the field.
The normal takeoff-and-landing area was devoid of such wheel traps, but the Chipmunk, with its slight hop and long rollout, had used much more runway than usual and ended up in the minefield. The left side gear had folded back, almost touching the wing.
The aircraft sorely needed a change in landing gear. Its wire gear was the only departure from an otherwise very attractive scale appearance; here was a perfect excuse to improve things functionally and make a major aesthetic boost in the process.
I considered making the gear longer to absorb some of the landing jolt and hopefully make it more “springy,” to absorb the initial jolt when aircraft and Mother Earth met.
Well-known Robart Manufacturing makes a set of spring-loaded oleo struts for the similar-size Great Planes Chipmunk. They seemed to be a perfect fit, so I ordered a set.
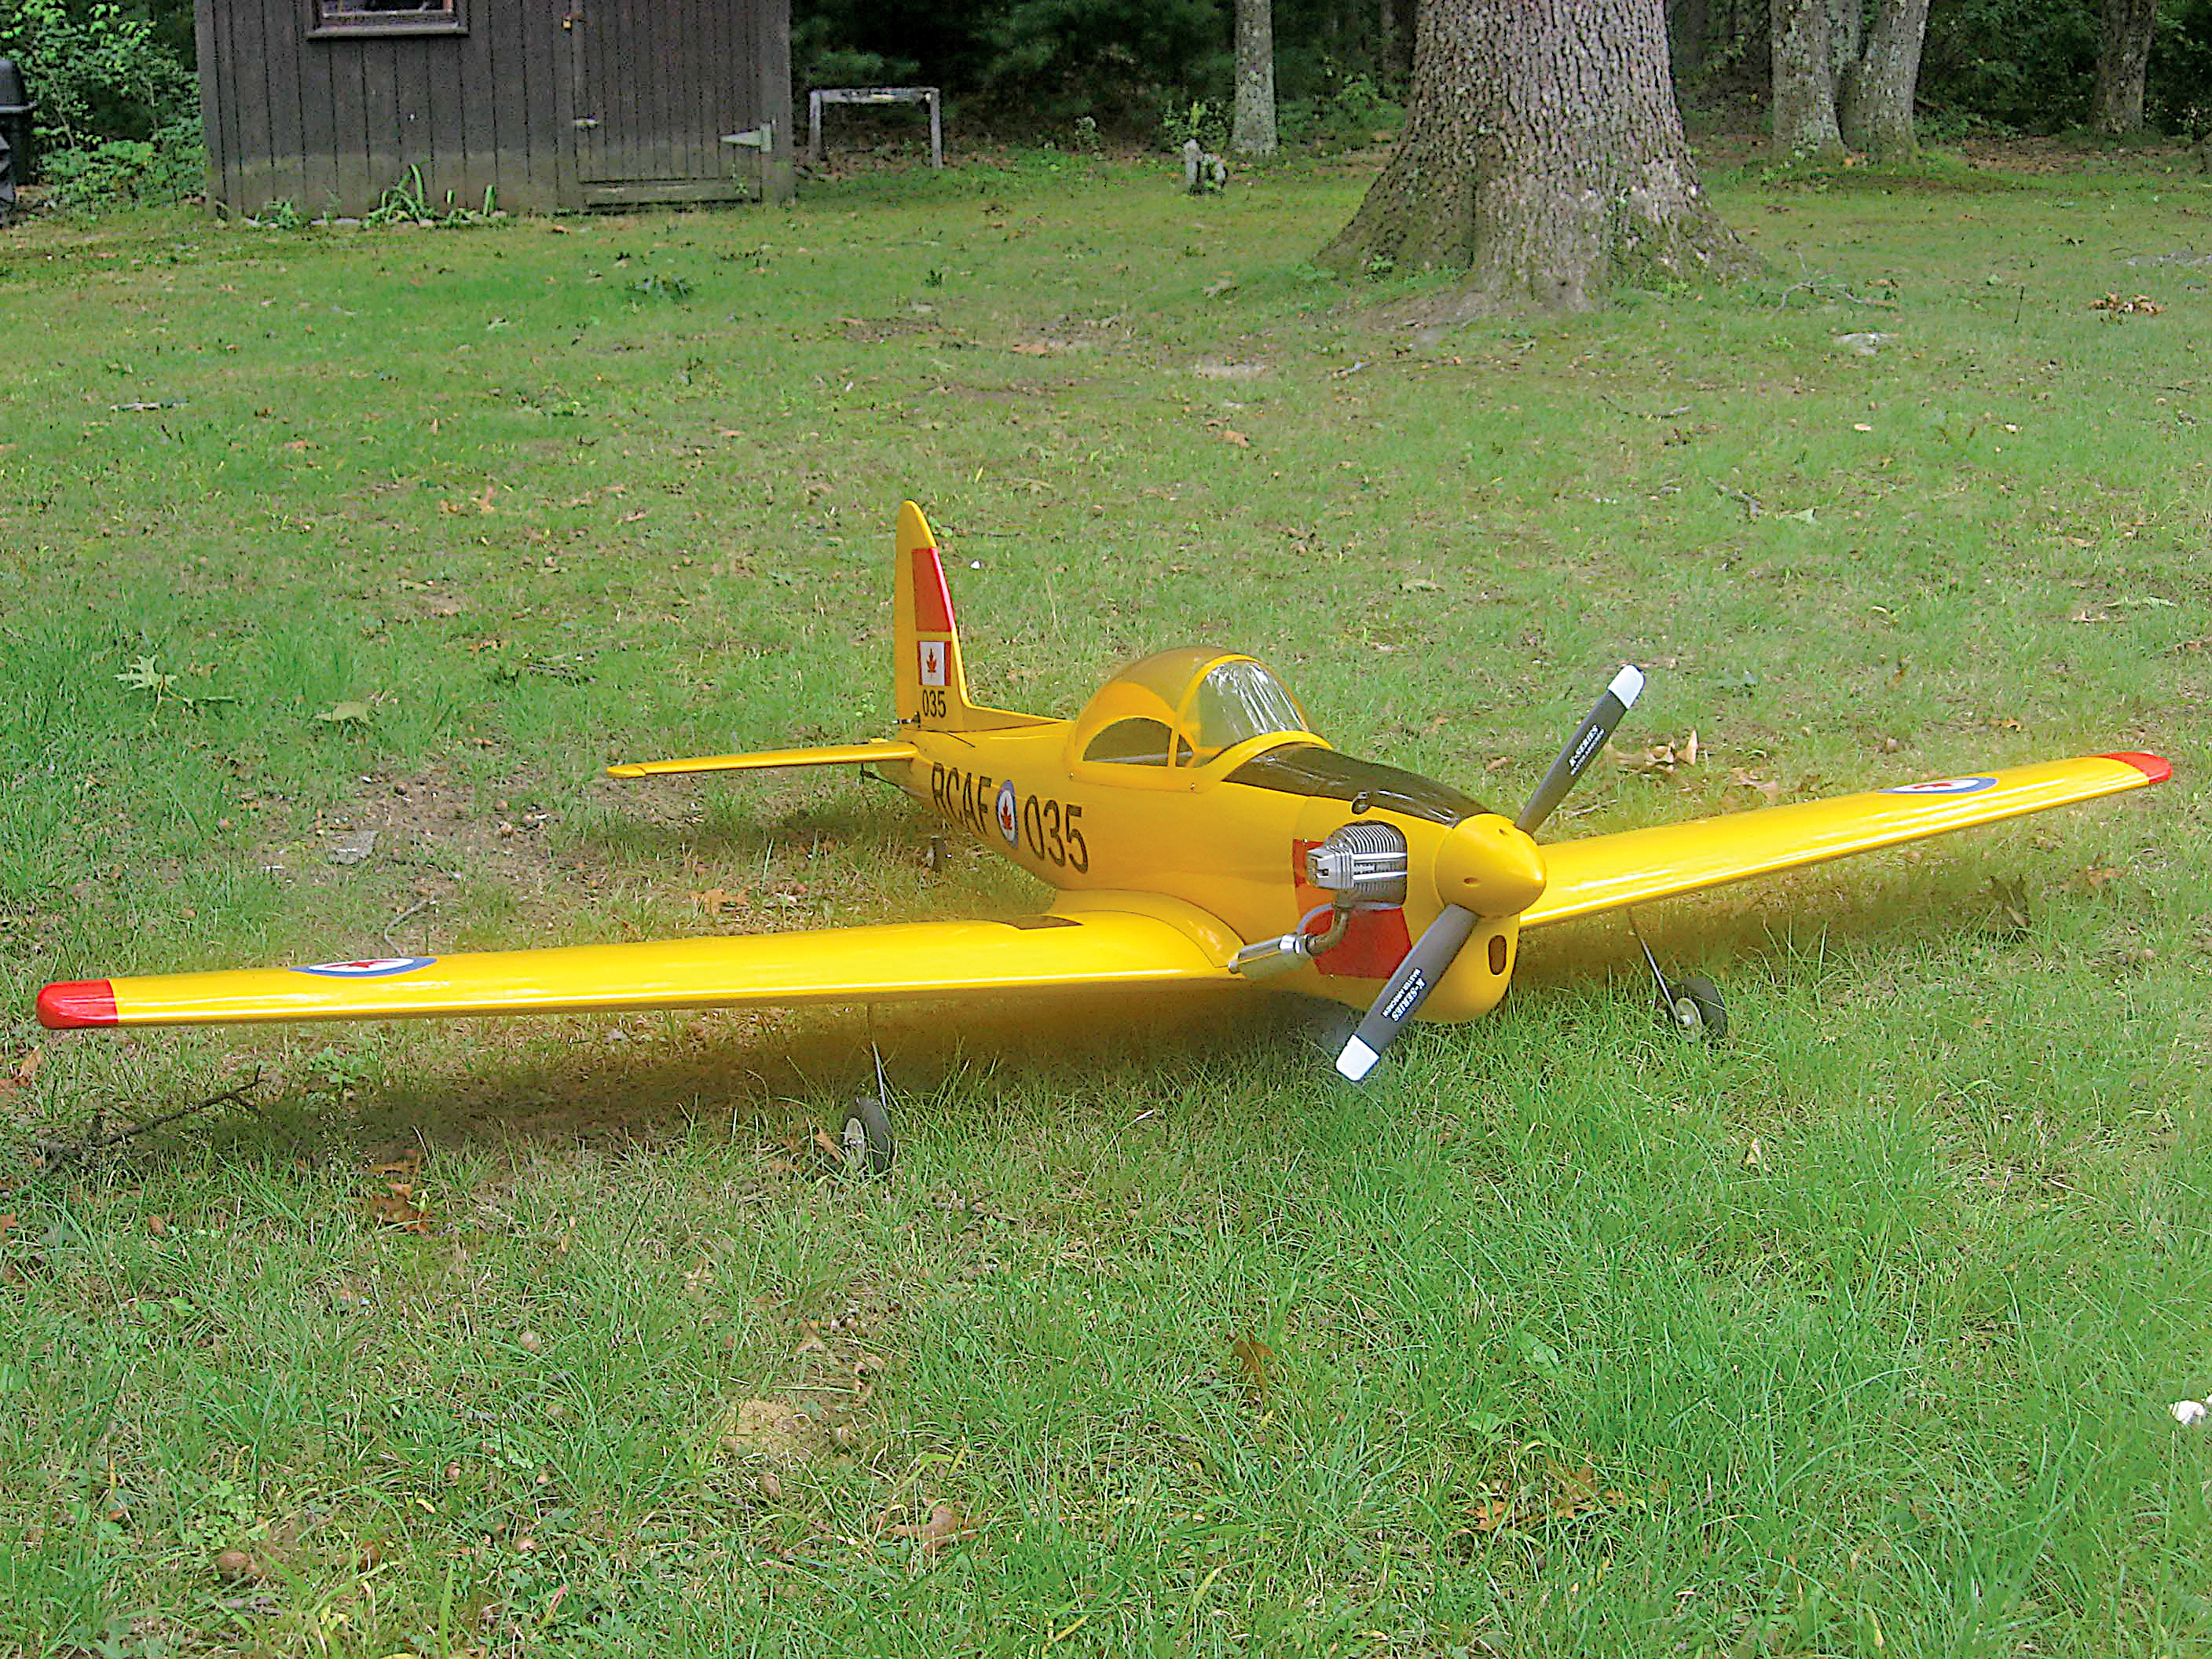
A week or so later they arrived on my front doorstep. The struts were truly nice and would add much-needed scale looks to the undercarriage of the Chipmunk, complementing the neat Canadian Air Force livery.
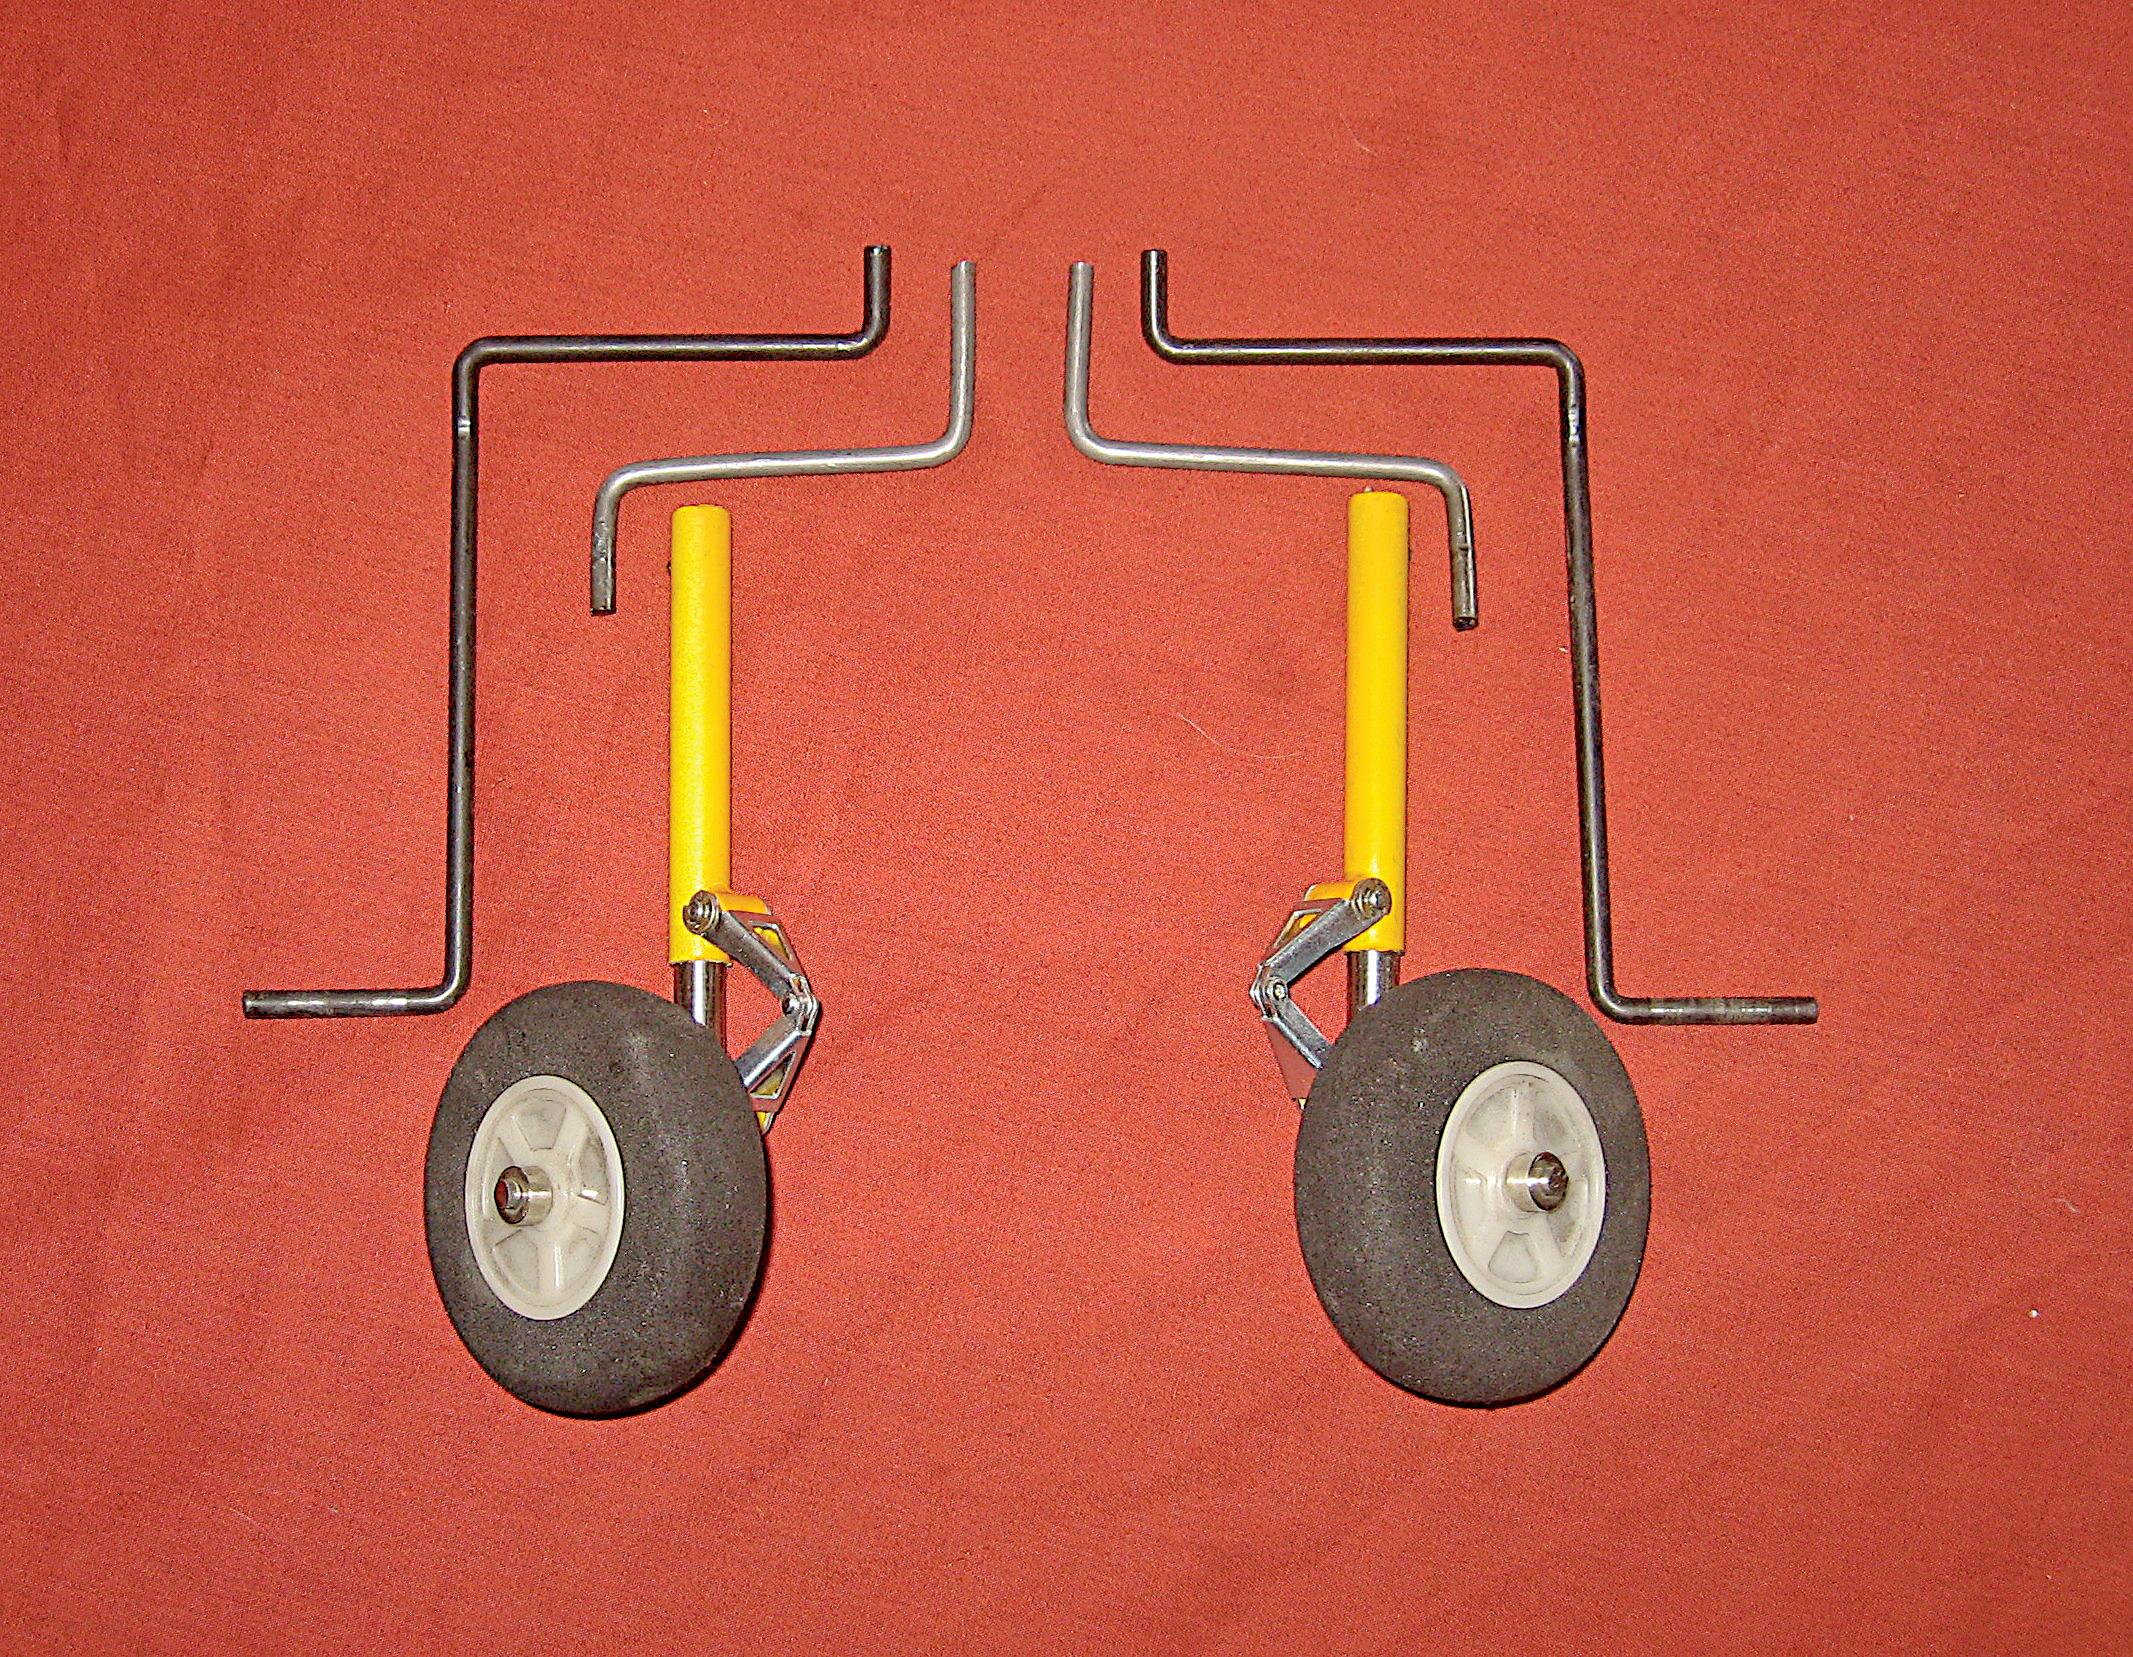
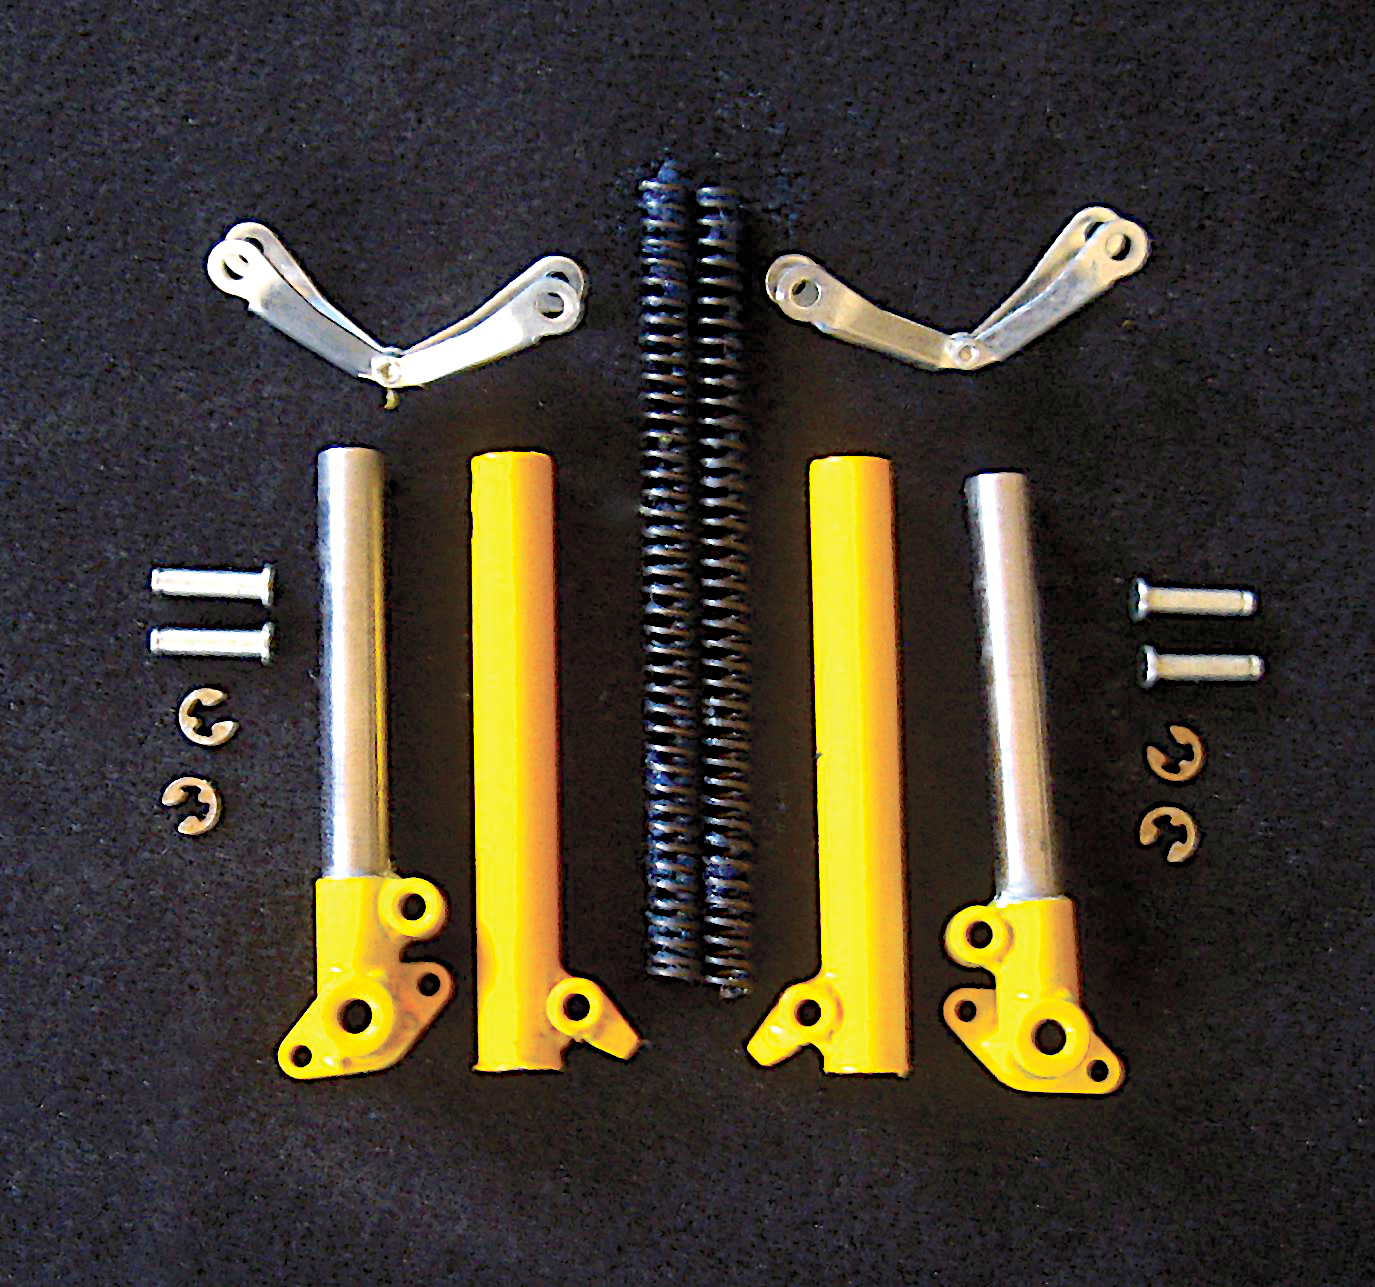
The Robart oleo struts are remarkable. They consist of painted tubular weldments that serve as the main body of the struts and polished barrels that contain coil springs and a cast attachment for the wire axles.
The polished barrels slide within the upper cylinders and provide effective shock absorption. The two parts are connected with knee-action links that provide directional stability, keeping the wheels pointed straight ahead.
Putting It Together: The original landing gear wires are normally cut down to allow the Robart oleo struts to be mounted. But since this modification was partially caused by the originals being too short, a new set of wires was in order.
I used a digital caliper to measure the diameter of the landing gear wire, and then I ordered a length from a hobby shop.
The new landing gear wires were bent on a purpose-built fixture. Bending this tough wire would have been a struggle without it.
As with the original set, the wires were bent to extend the wheels forward to the wing LE. If that was not done, the wheel center would have been directly on the balance point—not a good idea.
The new wires were made longer than the originals to extend farther into the lower reinforcing block within the wing. The ends of the wire that extended to the wheels were cut at an inch down from the wing, providing a mounting point for the new oleo struts.
As supplied, the painted portions of the struts are finished with a gray-green primer. I decided to paint the barrels of the struts Top Flite Cub Yellow, as was used to paint the plastic parts of the Chipmunk.
The primed finish didn’t seem to be a good base for the yellow paint, so I disassembled the struts and soaked the primed parts in acetone, which effectively removed the factory primer. Then I masked and sprayed the struts with several coats of white primer. When it had dried sufficiently, I applied the finish coats and reassembled the struts.
Repairing the landing gear mount was relatively simple. (See the repair sidebar.) I applied a small amount of epoxy to the hardwood mount to prevent fore-and-aft movement and mounted the landing gear wires using the original hardware. Then I inserted the exposed ends of the gear wires in the barrels of the new oleo struts and retained them with setscrews provided in the Robart kit.
The provided axle shafts are quite long to accommodate various-width wheels. I cut them to the proper length using a rotary-tool cutoff wheel, and then I installed and retained the shafts using more of the robust setscrews. Finally, I installed the original wheels using spacers and wheel collars.
The finished installation is attractive and much more scalelike than the original. Shock-absorbing oleo struts also prevent the hop on touchdown, allowing the model to remain planted. That shortens the landing run to less than half of what it was—a win-win situation.
The Robart oleo struts have been a worthwhile addition to my de Havilland Chipmunk.
The repair:
While landing my FlyBoy Models de Havilland Chipmunk, the left gear collapsed back, almost touching the wing. When I viewed the damage, I was baffled because I didn’t know what could have caused the collapse. The model had encountered no ruts or holes, as I had originally feared.
Back at home, I removed the gear, cut away the covering, and removed a rectangular section of balsa to gain access to the structure. Then the reason for the break became clear.
The part of the landing gear wire that extended into the wing was too short. Underneath the 1/2-inch-thick external mounting block, which had split, was another, drilled and affixed to the wing structure and at least 1 inch deep.
It was clear that a new set of landing gear wires needed to be fabricated. I made a set to eliminate the problem with the originals and to accommodate the new struts.
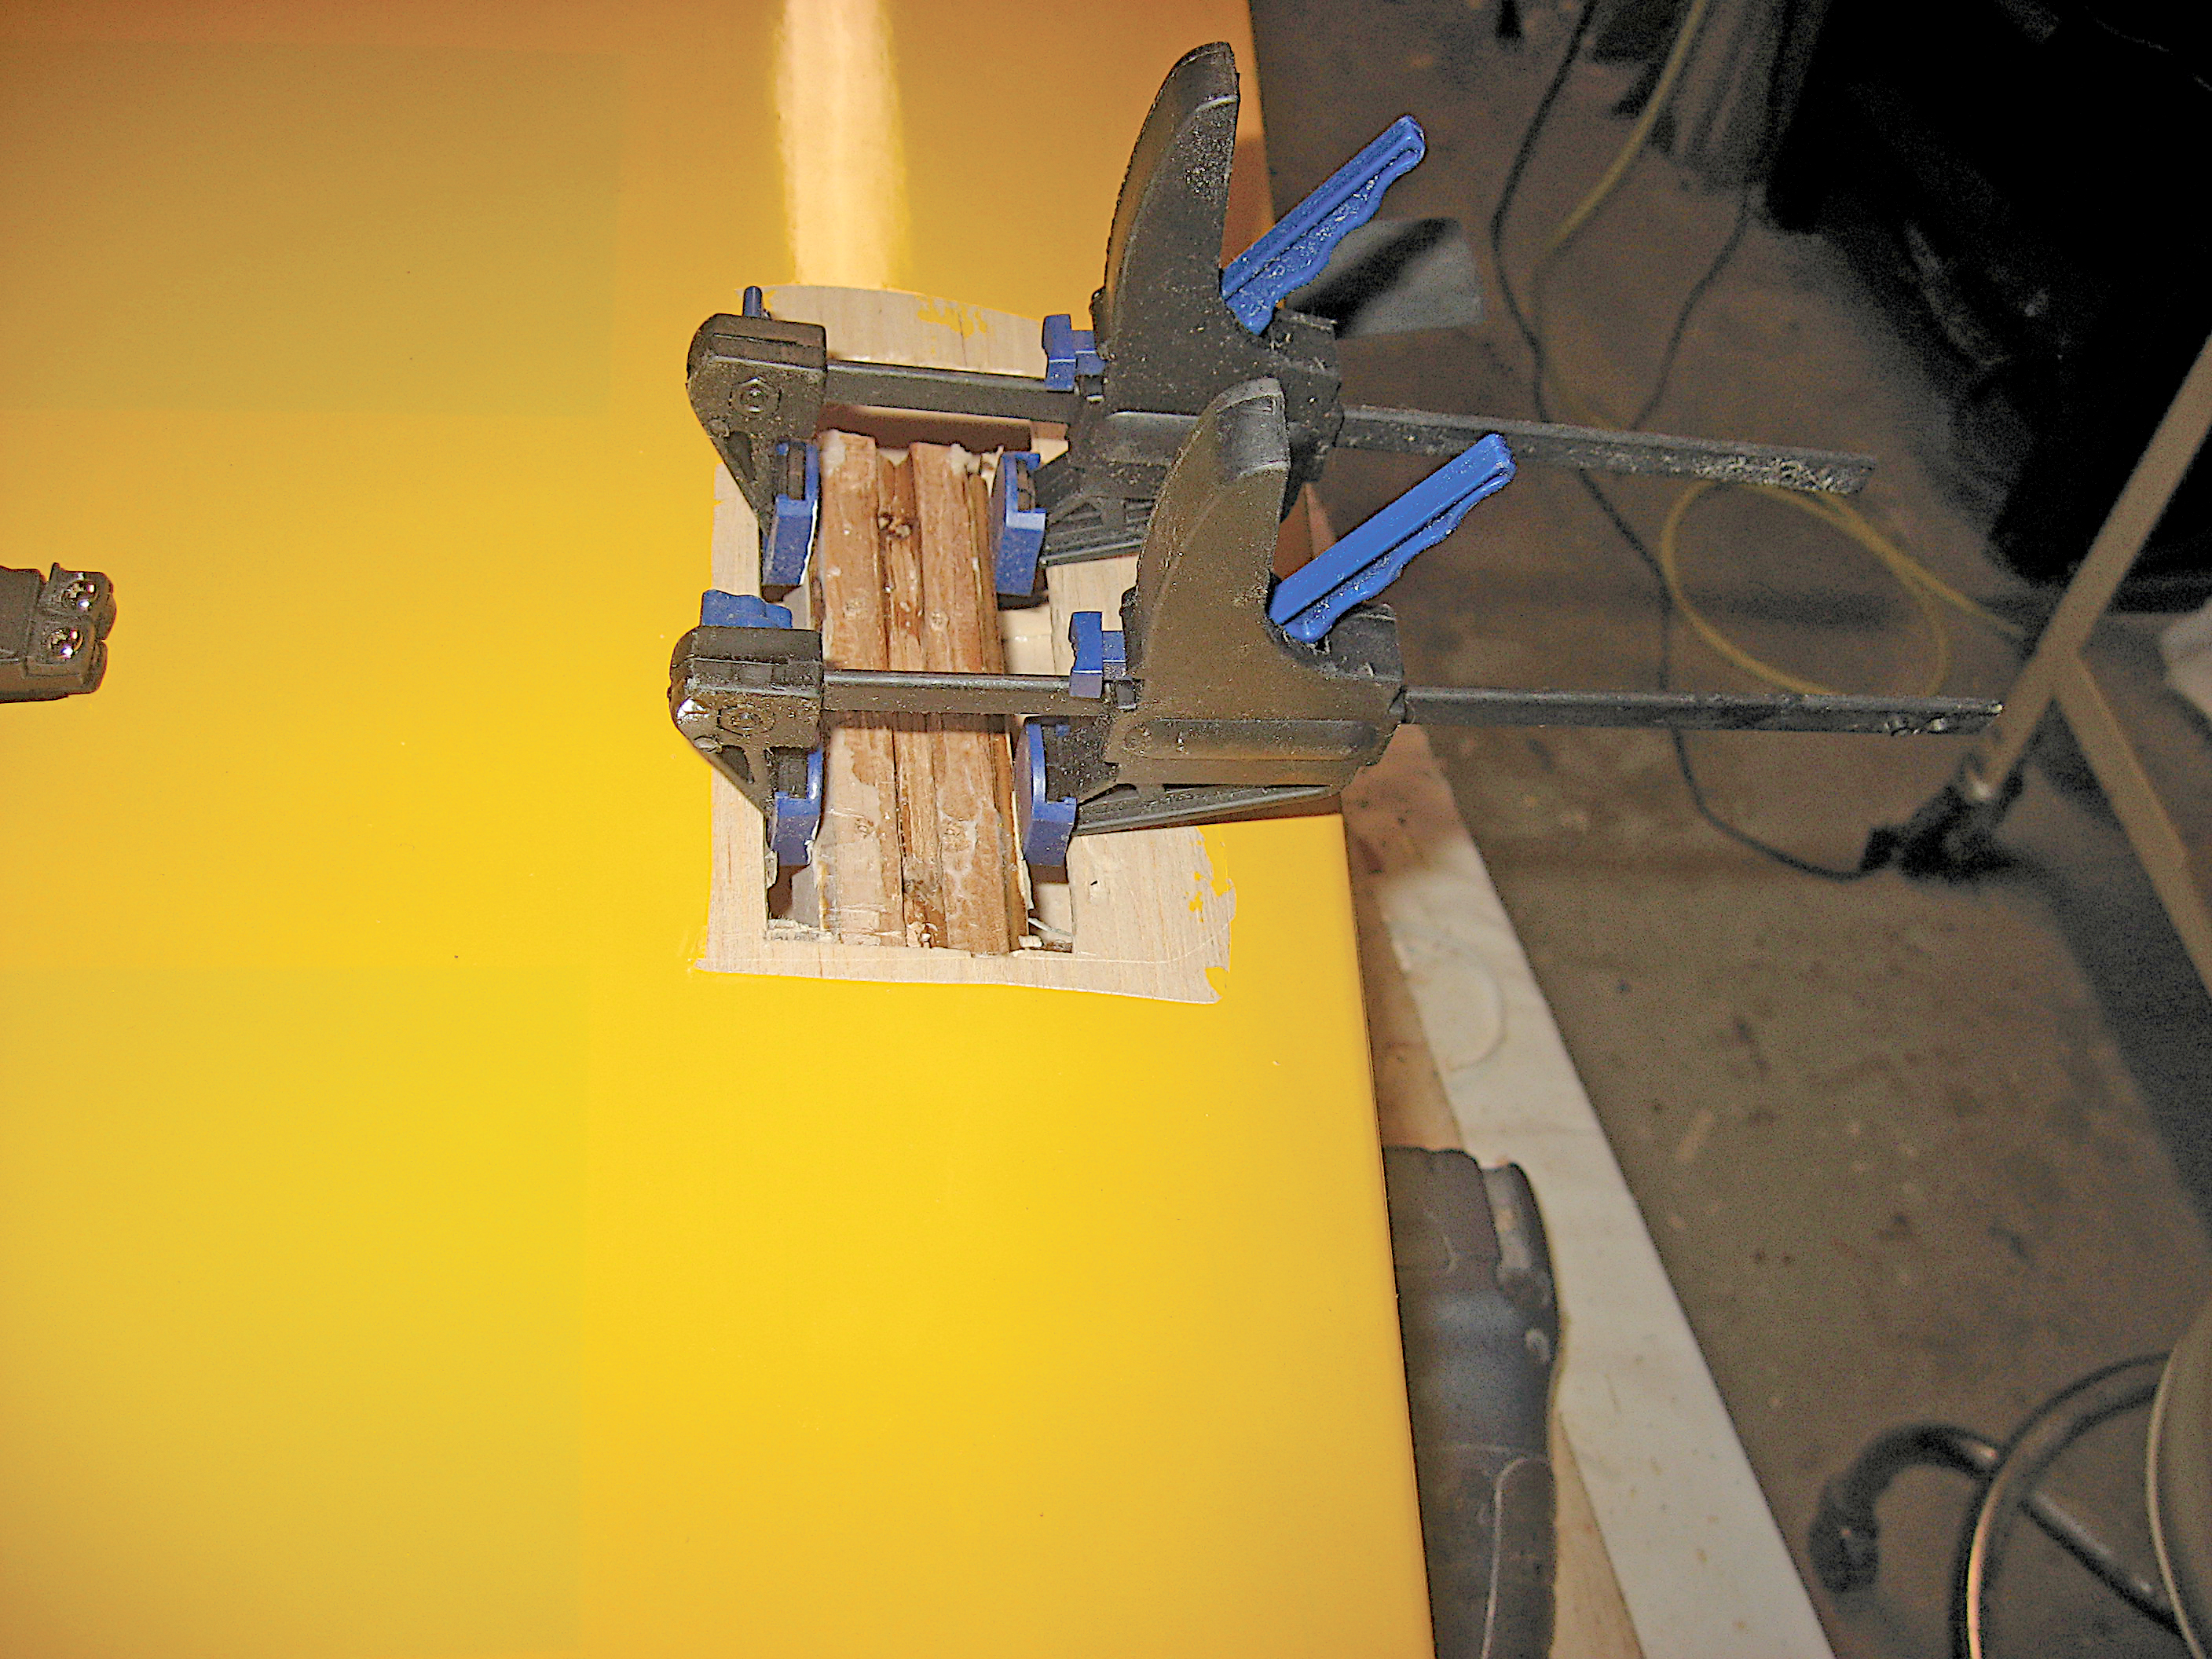
Since the original gear mounting block was cleanly split, I mixed some 30-minute epoxy and put the pieces back together. I used ratchet clamps to hold the structure together while the epoxy cured.
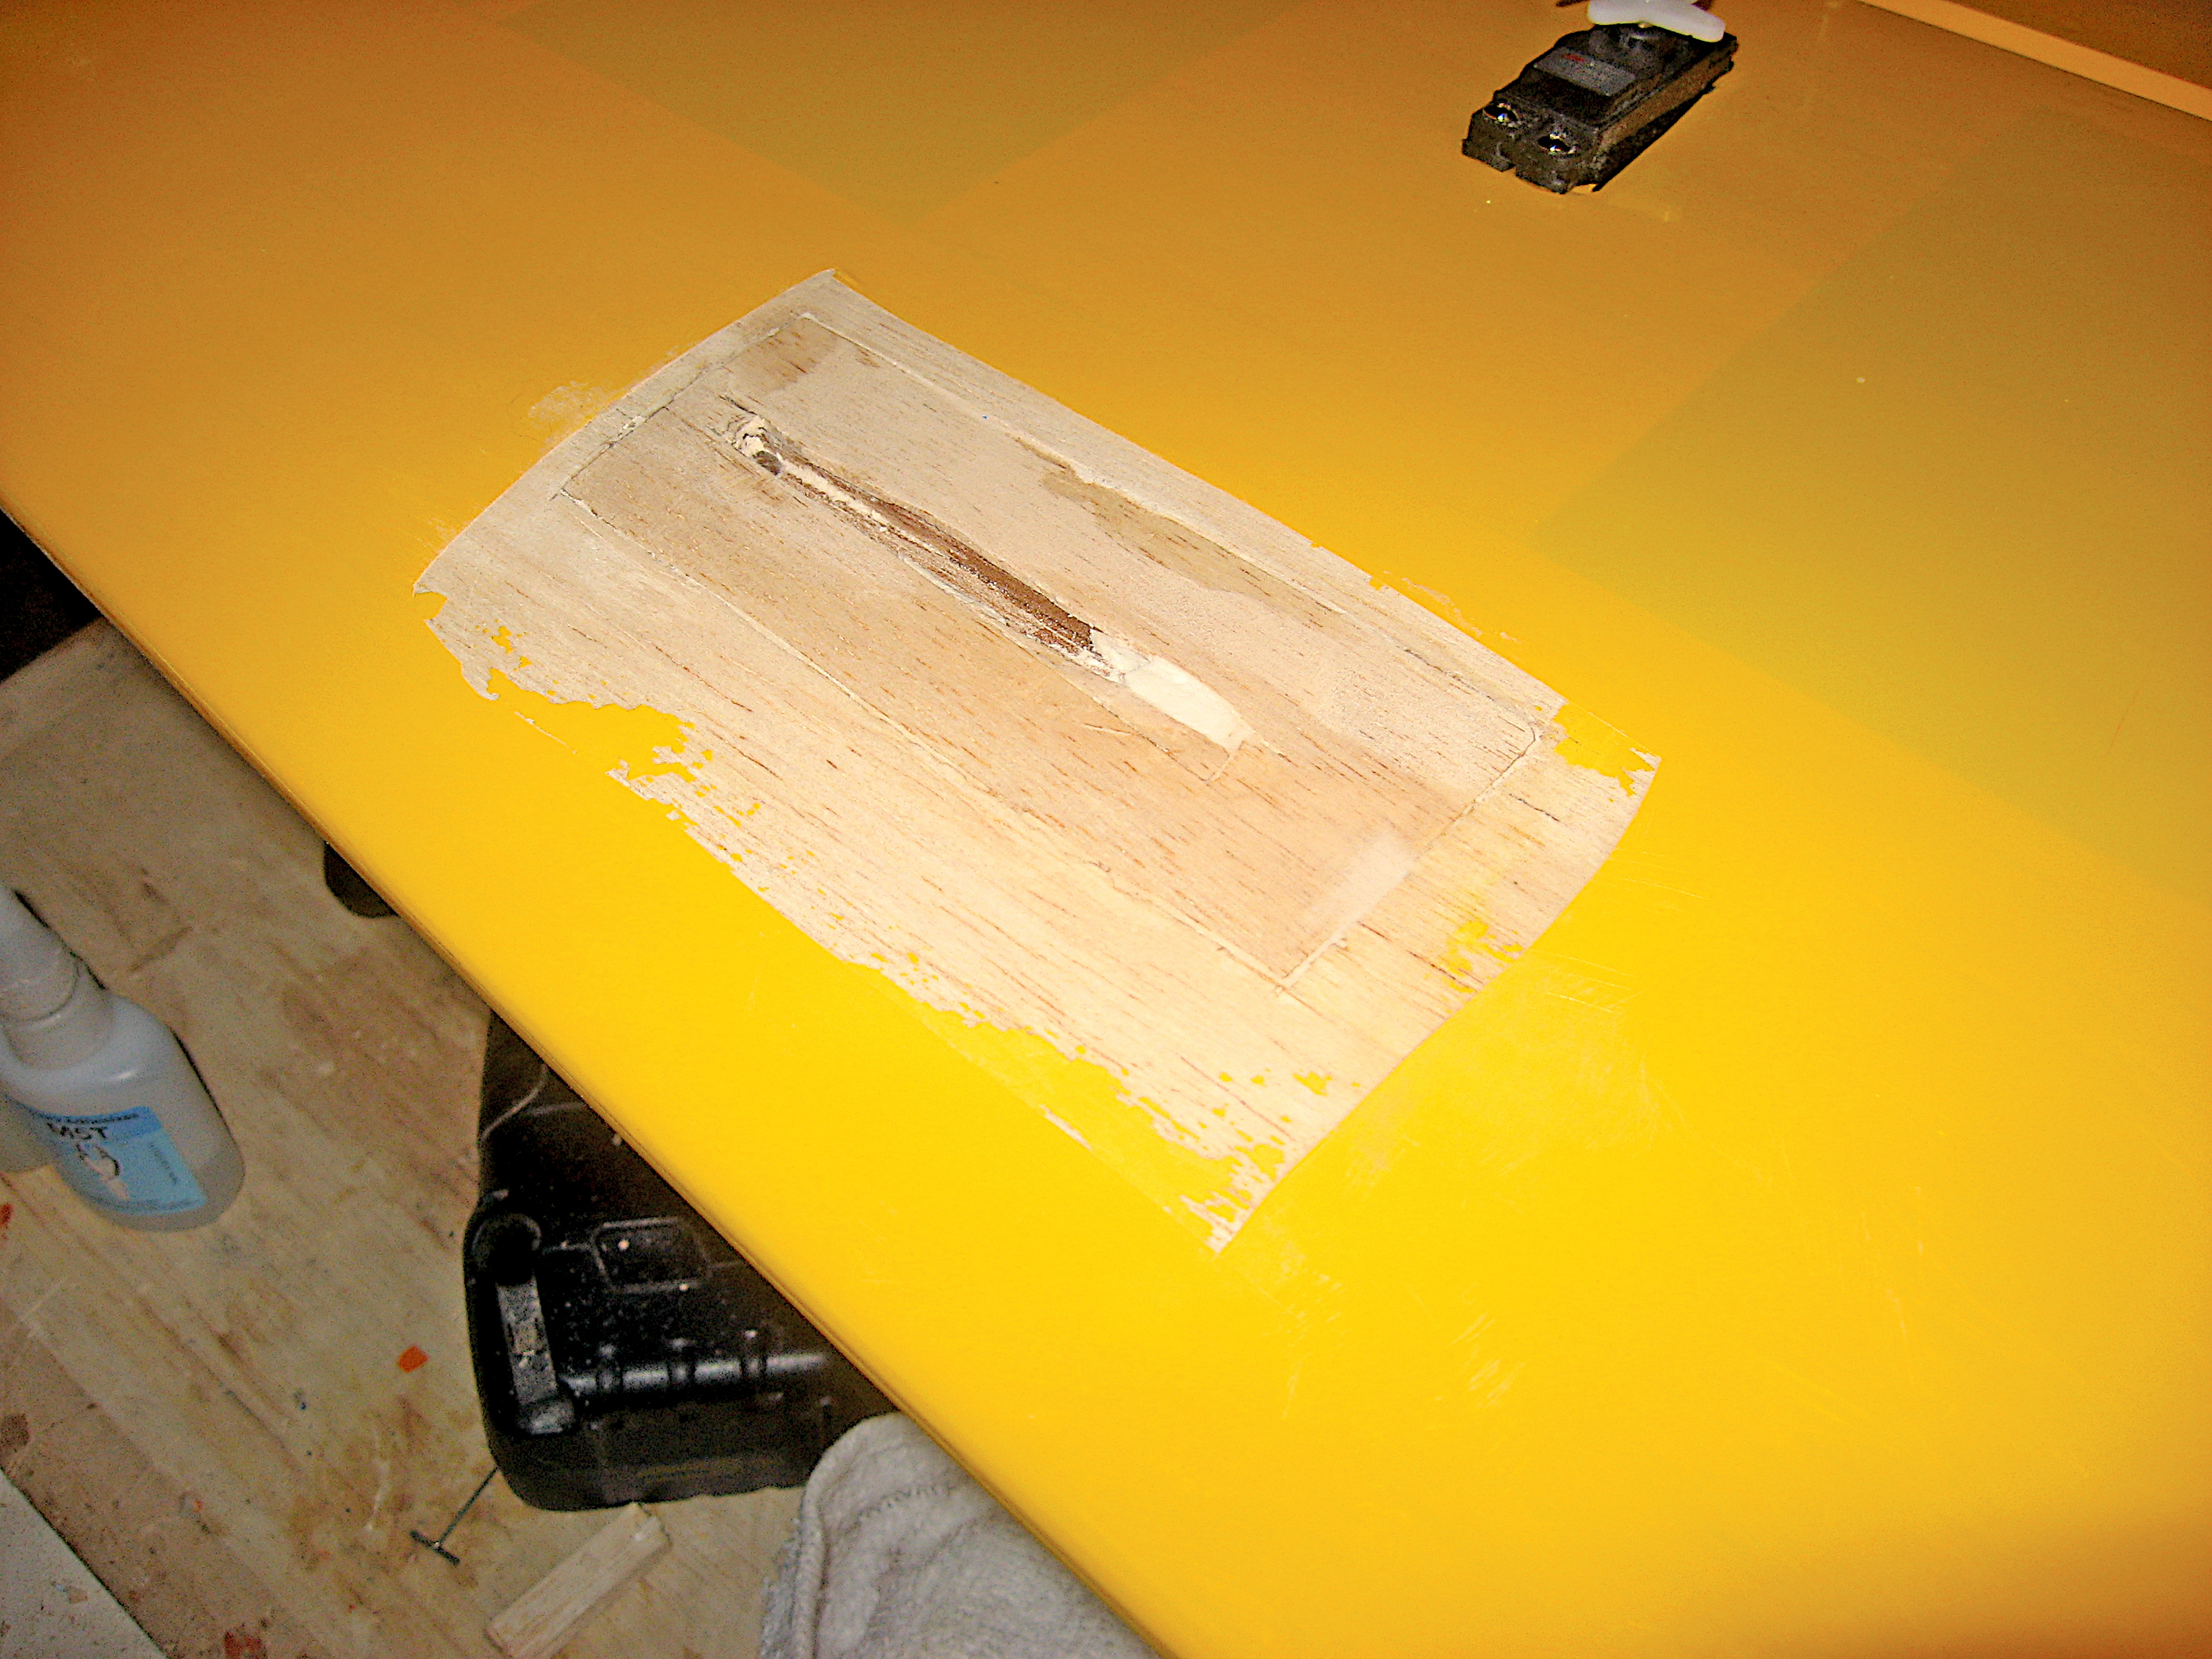
After examining the result for integrity, I replaced the missing balsa planking and then filled and sanded it until I could not feel the repair. Although it was not a perfect match, AeroKote Cub Yellow was close. I applied similar panels of the covering to both wings, to make it look as if it were intended to be that way.
I used the original hardware to install new gear wires. The inserted parts of these new wires extend deep into the internal hardwood blocks and shouldn’t be as susceptible to breakage as the original setup was.


Comments
Add new comment