
Written by Anthony N. Avallone
A guide to preflight inspection of model helicopters
As seen in the March 2011 issue of Model Aviation.
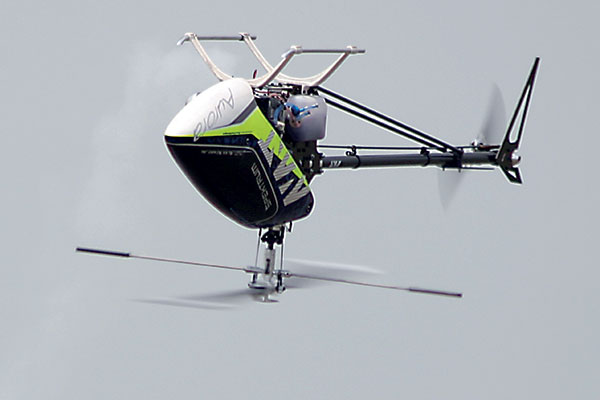
Today’s model helicopters are sophisticated machines that combine complicated mechanical and electronic systems, allowing pilots of all abilities to enjoy this unique form of flight. These models are incredibly reliable when you consider the factors to which they are exposed, including high-G loads from 3D maneuvers, rotor-head speeds exceeding 2,000 rpm, and, in the case of nitro-powered versions, significant vibration.
Because of their complex designs, as well as the rigors we put them through, mechanical failures do happen. In the realm of model helicopters, even a small defect, such as a loose or missing bolt or nut, can lead to a crash. Many defects can be found and corrected if they are caught in time through a preflight inspection, thereby preventing a costly rebuild.
A preflight inspection is normal in full-scale aviation. No conscientious pilot would take off in an aircraft that has not been examined. The risks to well-being posed by flying model helicopters are not as high as they are in full-scale aviation, but they are real. A machine that is out of control because of a mechanical flaw can be a danger to the pilot and spectators, especially during the takeoff phase when the machine is relatively close.
This article will outline a simple, systematic approach to inspecting model helicopters before flying. By detailing real-life examples with accompanying photos of problems found while examining my aircraft, you will learn how many issues that can lead to crashes can be avoided.
Unfortunately, I have learned many of the lessons I will present from accidents resulting from inadequate before-flight inspections.
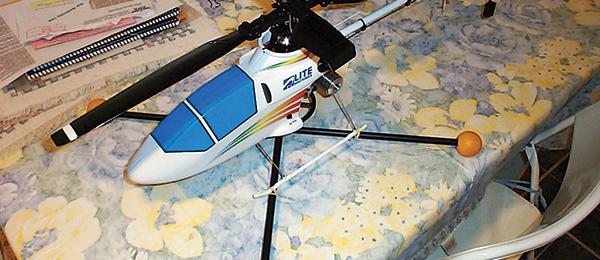
Preflighting the Helicopter: My examination begins at the rotor head and progresses down the left side of the frames, back along the boom to the tail, and finishes with the right side of the model.

Although the order of inspection does not matter too much, it is important to complete the assessment in a systematic fashion; that is made easier through a checklist. I have included a sample to get you started.
At the rotor head, I check attachment bolts to the main shaft, as well as the various arms and linkages. I pay particular attention to the blade grips; I have encountered loose spindles, and they are rarely obvious. Pulling out on the blade grips to check for play and pushing down on one blade grip while pulling up on the other will unmask a loose spindle bolt or worn head dampener.
Links can wear out, so check them regularly for excessive play. Additionally, ball links can develop splits following crashes that can be difficult to see.
Important nuts and bolts are sometimes in difficult-to-inspect locations. The bolt securing the main shaft to the main gear on my Align T-Rex 500 is held in place by a nut that is captured in a molding. The nut is more difficult to see than those on other helicopters because of its placement. I noticed that it was missing during a preflight inspection.

Before leaving the rotor head, I inspect each main blade for damage. I recently lost a starter coupling in flight and did not notice the damage it caused until a few flights later. The main blades looked normal viewed from above, but there was significant damage on the undersurface near one of the blade roots that could have led to a catastrophic and potentially dangerous blade loss. To prevent problems, now I run my hand along the leading edges of the blades and look underneath.

After inspecting the head, I check the main gear for missing teeth and belt tightness (or torque-tube gear mesh), in addition to making sure that the bolts attaching the pipe are tight. Some helicopter/pipe combinations are notorious for developing looseness and need to be checked regularly.
The next areas of examination are the servos on the left-side frame. Make sure that all servos are secured and that screws that hold the servo horns are in place—not missing or loose.
Working my way back to the tail, I check to make certain that the tailboom supports are secure. Many carbon-fiber-frame machines, especially nitro models, develop loose boom supports from vibration. If not caught in time, they can become detached and go through the rotor disk with disastrous results.
I go on to inspect the tail case to ensure that the bolts are tight and that the tail components and control rod are free and secured.

To complete the examination, I make sure that the tail servo is tight in its mount and that the tail control rod is secure and running straight through the guides. I check the right-side frame components in the same fashion as I do the left side.
Issues to check on the frames are fuel leaks, evidenced under the storage area, and silicone tubing that is past its prime, such as the pressure nipple on the pipe.

Servos with metal gears can become sloppy over time. Excessive lash can be noticed only if a pilot regularly inspects them to understand how a normal amount of play feels.
Gyro tape can age and lose its grip without warning. Replace the insulating foam tape once a year, and wrap the gyro with a Velcro strap for safety.
The power switch is a known high-failure point. If it’s not soft-mounted, expect to replace this component every season.
Many of the problems I have encountered during preflight inspections are those that I have noticed before a helicopter’s first flight following a repair caused by a crash, which can be a particularly vulnerable time.

Sometimes during a repair, it is unclear which components are damaged and which are still usable. As a result, it is necessary to temporarily assemble the components with the intention of going back and formally completing the fix. But this process often leads to errors.
Now I know that if I am going to put a part in a helicopter with the intention of going back and securing it with threadlocker, I need to write it down! A particularly careful inspection through a checklist needs to be accomplished before the initial flight following a crash repair.
Preflighting the Radio: Before each model flight, the radio should also undergo an inspection; it takes only a few moments longer.
Does the transmitter battery have adequate charge? Has the correct aircraft been selected for the machine that is about to fly?

Then I question whether or not the receiver battery or flight pack is fully charged. The LiPo batteries we use are light and powerful, but they do not tolerate overdischarge. Even one instance can significantly shorten their lives or make them unusable.
I also like to be sure that the gyro has booted up correctly.
In nitro-powered helicopters, hot starts are to be avoided at all costs. They can be dangerous and usually end up requiring clutch or clutch-liner replacement. To avoid a hot start, make sure that the throttle is working correctly, that it is not reversed, and that the idle-up switch has not been inadvertently moved from normal to an idle-up position.
When you are at the flightline, check the cyclic and rudder controls prior to spool-up. Are the controls working correctly and not reversed? As you spool up the model, be on the lookout for abnormal motions. If any exist, it is best to bring the radio and model back to the workstand for closer inspection. A servo that is going bad will sometimes reveal itself under load.
Finally, is the helicopter a safe distance from you and well away from spectators? How about other traffic? In my club, we are able to mix helicopter and fixed-wing flying by being courteous and aware of how the two aircraft types use the runway and pattern.
Incorporating a proper preflight inspection that takes less than 5 minutes into your helicopter-flying routine can prevent costly crashes.
Have fun and fly safely.


Comments
Add new comment