
Learn how to build a semiscale version of the 1901 flying machine
Photos provided by Andy Figlar
If you like building historical airplanes, this semiscale offering is for you. The full-scale Whitehead Model No.21 Condor was an intricate craft with a boat-like fuselage that was originally flown on August 14, 1901. The wing spars were bamboo; the wing spars on yours will be as well. The covering was linen; you will use vellum or tracing paper. This much smaller version will be 19 inches from wingtip to wingtip and will weigh in at approximately 23 grams.
This article will take you step by step through how to build a complete, flyable Whitehead Model No.21 Condor.
This guide has been workshopped at length by members of the Flying Aces Club (FAC) group. We fly indoors in a grammar school gym that is 72 feet long, 40 feet wide, and 30 feet high. We have built at least a dozen model aircraft that have flown successfully. Our Whitehead Model No.21 Condor also flew successfully, with low and smooth realistic takeoffs and a climbing left-hand turn. The airplane held altitude 10 feet off of the gym floor in a turn and landed smoothly and realistically. We recommend that this model be flown by intermediate to expert fliers.
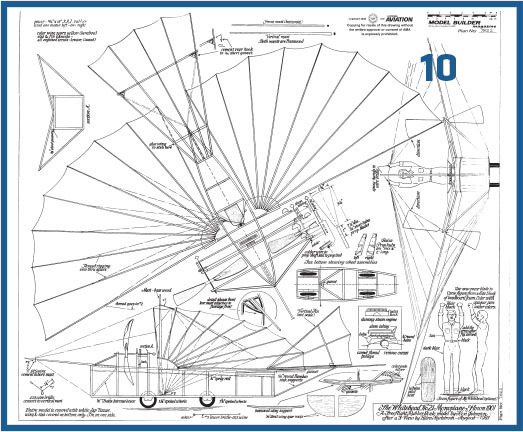
The plans sheet drawing, shown as Photo 10 on the second to last page of this article, is an essential starting point to create this model, although we made extensive changes to some aspects of the plans based on personal experience. The plans sheet is available for purchase through the AMA Plans Service. The link to it is listed in "Sources," or search Whitehead No.21 on the AMA Plans Service website to find it.
Step One: Making the Boat Hull Jig and the Hull
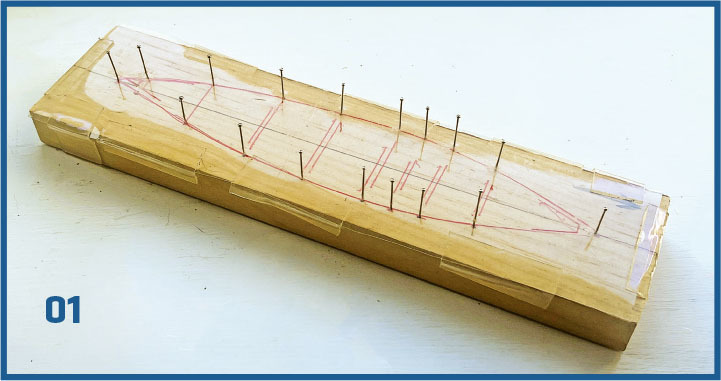
Before you can make the hull, you must build a jig out of soft pine or foam that is 8 inches long x 4 inches wide. Using the plans pattern, drill on the dots with a pin vise, making slightly smaller holes and tapping in the pins, as seen in Photo 01.
Next, make the hull itself out of 11.5-inch-long bamboo skewers. We used a Black and Decker belt and disc sander combination for this. We sanded approximately 10 skewers down flat from 3.5 grams to 1.5 grams. Press the bamboo against the belt and sand back and forth until it’s flat on both sides.
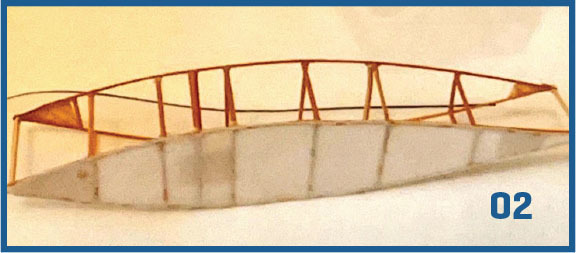
Now the flat bamboo has to be warped using steam to fit the jig. We used a skirt steamer, but you can also use a steam kettle. Steam four bamboo flat skewers to make the curve that is already indicated on your jig. Put the steamed piece on the jig and let it dry so that it retains its shape. Remember to make four pieces: two on the bottom and two on the top. After it dries, glue in the bottom cross-support pieces for the bottom and the top and remove it from the jig. At the end of this step, your model should look like Photo 02.
Cut the bamboo bow and stern posts using your scale model plans. Turn the fuselage on its side and cut the vertical support pieces. Next, glue the bottom to the top. We used a variety of glues for this step, including Loctite Super Glue Gel and Liquid and Bu Lai En T-8000 Super Glue. You can also use medium CA glue.
You are almost finished with the hull. The final step is to glue the vellum. Cut three pieces of vellum 4 × 3 x 8 inches. T-8000 Super Glue worked best for this because it is slow to dry, giving you time to position the covering properly. Glue the sides then slightly overlap the bottom, the stern, and the bow. Sand it when it’s dry. The final product should look like Photo 03.
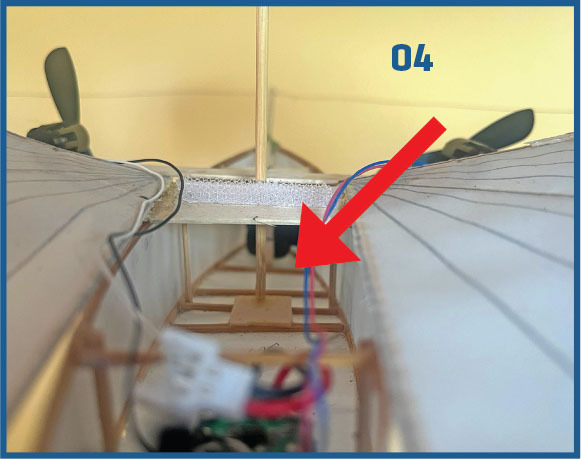
Next, the T-8000 Super Glue can be sanded with very fine-grit sandpaper. Make a small rectangle from 1/32-inch bass wood to be used as a base. Drill a hole in the center for the mast and glue it into the hull, as seen in Photo 04.
Cut four small balsa reinforcement triangles and glue them into the bow and stern, top and bottom.
Congratulations! You have now completed the hardest part: the hull. Gustave Whitehead designed this feature on the full-scale airplane because he was once a sailor and was going to fly along the beach in Bridgeport, Connecticut, where he anticipated a possible water landing.
Step Two: Building the Wing Tray and Bowsprit
Cut the wing tray partially on one side and bend it upward to make the proper dihedral. Make a notch in the tray to accommodate the mast and glue it according to the plans.
Install the bowsprit so that it rests against the first upper fuselage crossmember. Reinforce the first crossmember to accept the bowsprit.
Step Three: Building the Wing
From the scale plans, begin to build the wing halves. Gustave used nine bamboo ribs on each wing for support, but you need only to use three on each wing to save weight: ribs one, five, and nine. Make two bamboo leading edges (LEs) 9 inches long, sanding the skewers down to provide a flat surface of 1/16-inch thickness.

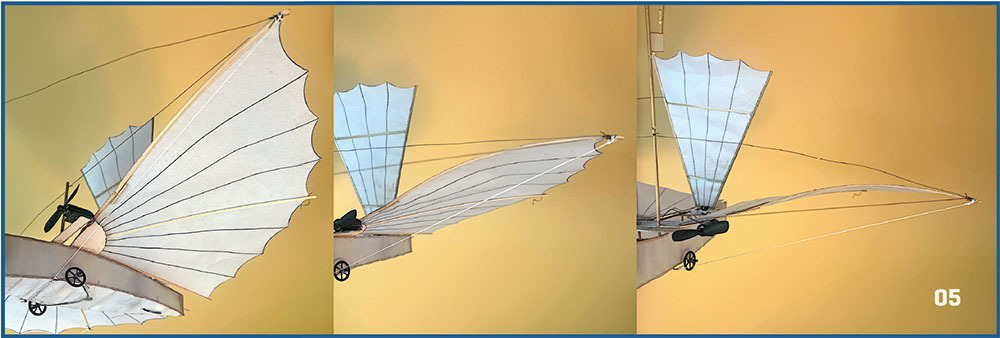
Steam the two skewers into the shape of a bow. The center of the LE should form an arch measuring ¾ inch from the flat surface that you’re working on. The second set of two 8-inch bamboo skewers is sanded and steamed that same way to an arch of½ inch. The third rib, 6 inches long, is straight with no bend. Photo 05 shows all three skewers forming the wing structure.
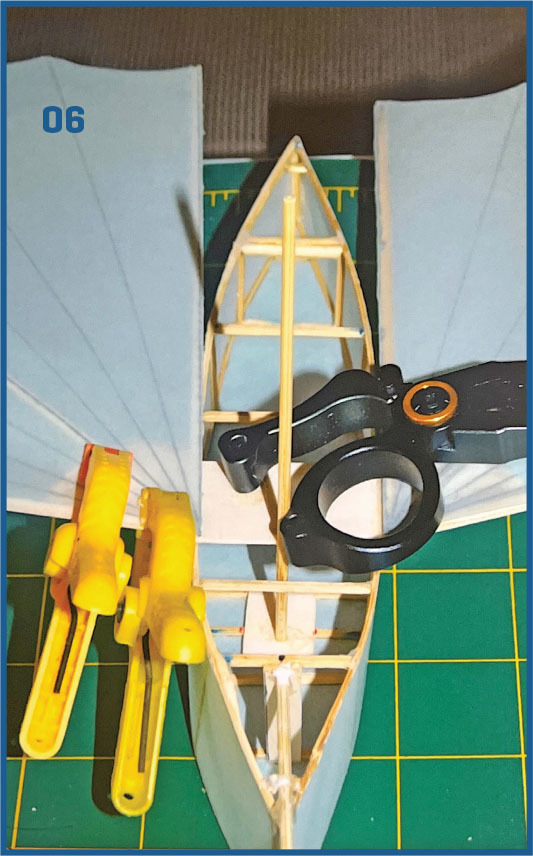
Glue the three ribs to the vellum according to the plans, with the ribs on the top or the bottom of the wing. Complete both sides then glue the completed wing onto the wing tray as shown in Photo 06. Make sure that the wing is square and parallel to the hull. You have now completed the wing!
Step Four: Building the Elevator
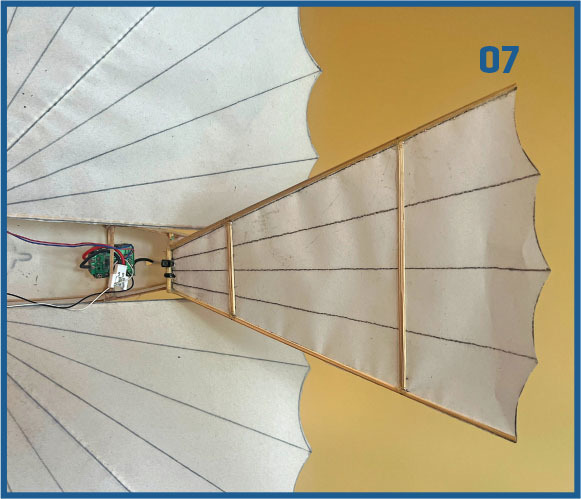
Sand and cut three bamboo skewers flat. Glue them to the top or bottom of the vellum, depending on which side you chose in step three. Gustave used five linear bamboo rods. You will be using only two outside and two inside support pieces to save weight, as seen in Photo 07.
Reinforce the front and, using ultrasmall plastic ties, anchor the elevator to the upper fuselage support bar. Reinforce that bar. This allows you to raise or lower the elevator. We found that 20° to 30° of elevation worked best in getting the No.21 off of the gym floor. Use a small piece of foam to prop up the elevator. You are now done with the elevator!
Step Five: Buying and Installing the Electronics
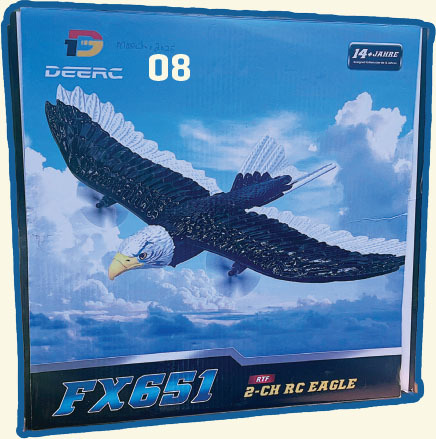
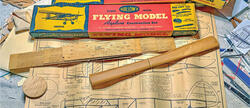
Purchase the DEERC FX651 RC Eagle airplane with tractor propellers for your electronics; the box for it is shown in Photo 08. We found that this system is ideally suited for the power and weight of the No.21.
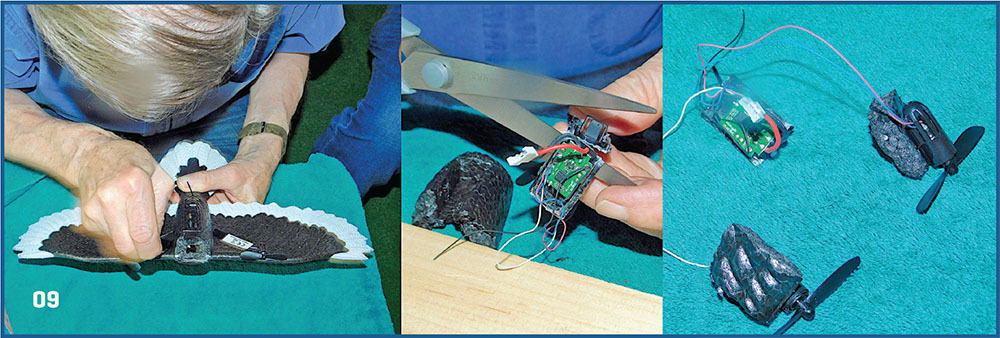
Carefully split the Eagle open and remove its board and propellers, as seen in Photo 09. Install the board in the same direction as it was in the Eagle. Glue the motors onto the basswood motor tray ahead of the mast then glue the board in the hull behind the mast. Next, glue the wheels from the Eagle onto the bottom of the hull, just under the mast.
Finally, using very lightweight white sewing thread, secure all points as shown on the plans, making sure that the wing halves are pulled down tight, evenly, and with the correct arch.
The center of gravity is just below the mast. Balance it accordingly with the battery provided by your DEERC Eagle. Your No.21 model should weigh between 20 and 35 grams; if it is any heavier, it will not fly.
Our final model, shown on the first page of this article, flew at 23 grams. We recommend flying it only in a public-school gym with a high ceiling and never outdoors.
Contact Andy Kosch at the email address listed in "Sources" for any questions about the Whitehead No.21 Condor.
SOURCES:
Whitehead No.21 Condor, Plans Number MB7822
AMA Plans Service
(765) 287-1256, ext. 507
Andy Kosch


Comments
Add new comment