Have you ever looked into one of your airplanes and seen a mess like the one in my photo? I have, and that ended 2025 with a bit of renewed attention to detail. No more wiring an airplane and trying to figure out what plugs into where after it’s assembled. The best solution is simple and easy to implement.
Image
This was the rat’s nest of wiring inside Greg Gimlick’s Giant Scale Bristol. Nothing was labeled, and once he removed the receiver for replacement, it was a guessing game.
Image
These wires were all identified and labeled, so installing the new receiver—and knowing that the right wire is in the right slot—will be a breeze!
Image
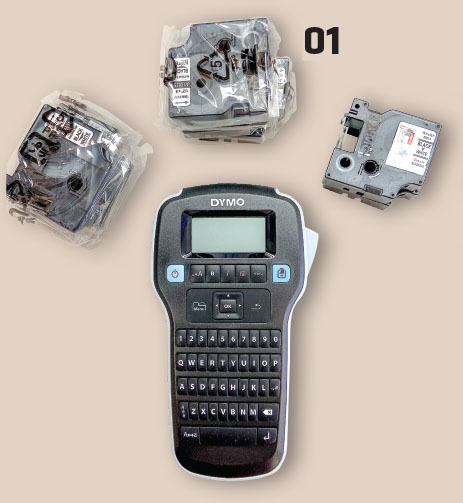
01.The Dymo LabelManager 160 Portable Label Maker, cartridges of print tape, and printable heatshrink tubing are the answer!
Image
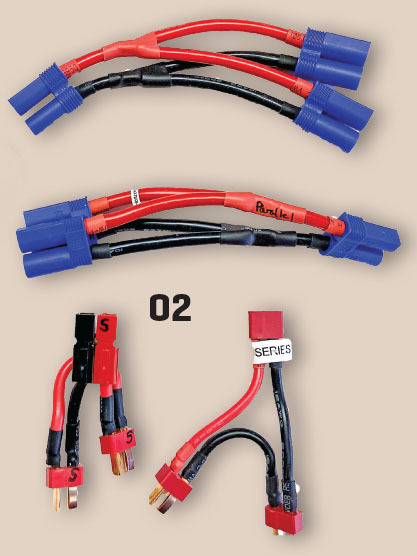
02.These adapter cords have been labeled using pens and tags, but the ink is often hard to read or it rubs off. The labels will be replaced with printable heat-shrink tubing.
Image
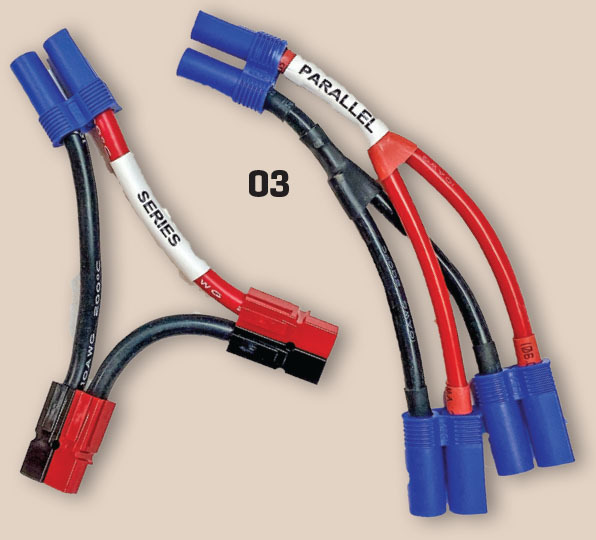
03.Removing the plug and slipping on 1/2-inch heat-shrink tubing labels makes it much easier to quickly identify the wires.
Image
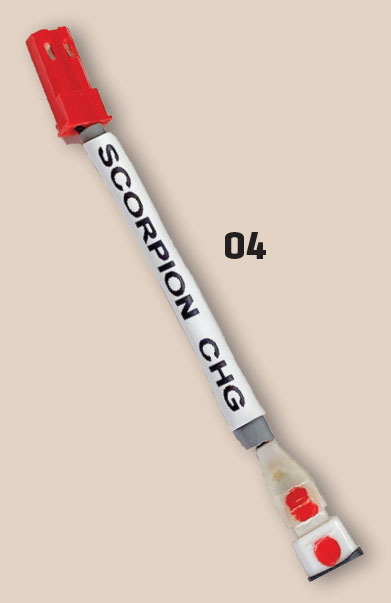
04.The author has dozens of small adapter cords for charging various micro models with oddball connectors. Now they’re all labeled for easy identification. This is a big plus for safety as well!
I was following one of the Facebook model airplane groups and saw that someone had labeled their wires with a label gun and heat-shrink tubing. I had no idea you could print on such stuff! Credit goes to Greg Alderman, with JAG RC and Electron Retracts, and David Payne, from Horizon Hobby, for educating me.
You can spend a lot of money on a label gun if you need it for commercial purposes, but David pointed me to the inexpensive Dymo LabelManager 160 Portable Label Maker and a few aftermarket cartridges for 1/4-inch and 1/2-inch heat-shrink tubing. This gem has a QWERTY keyboard and more than enough functions for the average modeler. More expensive label makers will create labels larger than 1/2 inch and do other things, but so far, this has been perfect for me. It came with regular label tape, which I use to label battery boxes, batteries, and multiple parts drawers.
I’ll let the photos and captions tell the story, but this is a game changer for me. I find that the 1/2-inch heat-shrink tubing is the size that I use most often because it has a 3:1 shrink ratio, but it is big enough to slide over servo plugs without removing them. If you’re making up your own extensions or customizing them, you could use the smaller heat-shrink tubing and put it in place before you attach your connectors.
Image
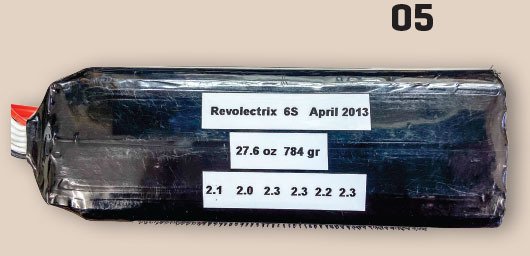
05.All battery packs get regular tape labels that show their inservice date, weight, size, and baseline internal resistance (IR) numbers. The IR labels allow Greg to see how the packs change over time. He logs periodic charges in a notebook.
Image
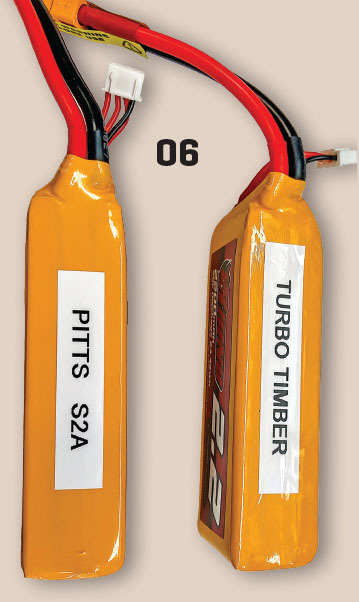
06.Various sizes of battery packs only fit specific airplanes, and it’s not always immediately clear which airplane they’re for. Labeling those that are specific to a certain airplane helps ensure that the author grabs the right ones before heading to the field.
Image
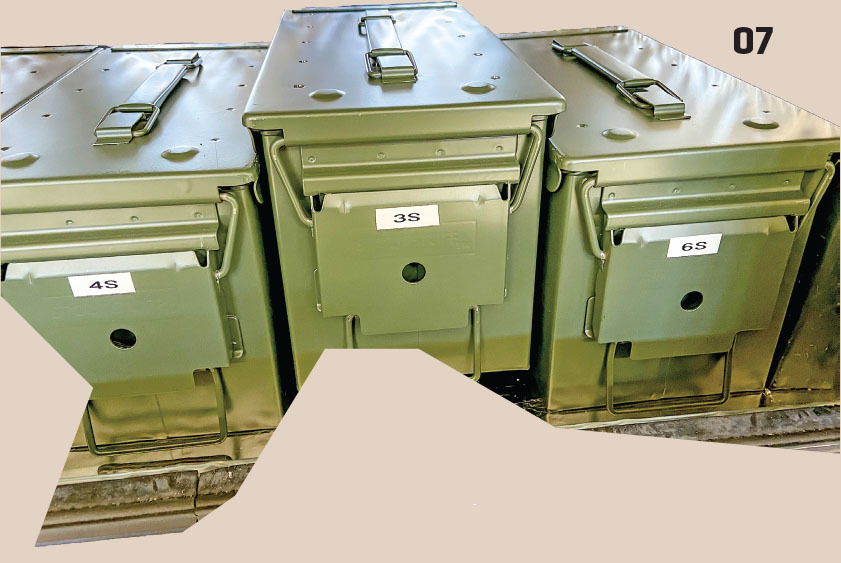
07.Greg’s storagelocker box contains multiple ammunition boxes with fire-safe LiPo battery bags inside each one. At a glance, he can grab the box with the right cell count.
Image
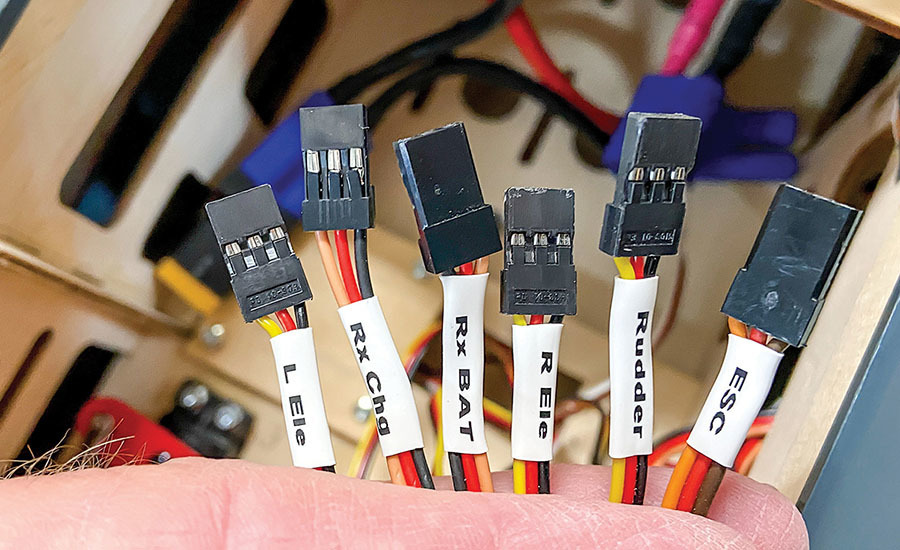
08.These are the labels made for the Bristol model that appears in the first photo. All are made from 1/2-inch heat-shrink tubing cartridges.
No more smudged, handwritten labels for this guy! Better yet, this makes me feel that my level of safety has increased tenfold.
Written by Jim Ryan How To Tame the Wire Monsters Column As seen in the September 2019 issue of Model Aviation. With the increasing availability of reliable, electric-powered, retractable landing gear
Written by Greg Gimlick Contributed column As seen in the April 2016 issue of Model Aviation. Wake up your mess! It’s flying season! I know some of you have the luxury of flying all year round, and in
Great ideas from our readers How-to As seen in the July 2017 issue of Model Aviation. Rivets There are many ways to add scale details to a project. One of my favorites is rivets—lots of rivets. There


Comments
Add new comment