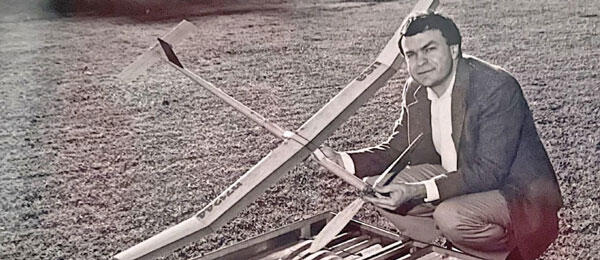
Most modelers who are reading this have built model airplanes from kits. I have been building RC model aircraft for much longer than I care to mention. Ever since I started rolling down this runway, my earliest recollections are stealing the box of straight pins from my mom’s sewing kit and pinning balsa parts to a cardboard building board over wing plans of a Comet stick kit.
These kits came with all of the part outlines printed in blue ink onto the surface of a balsa sheet. With a single edge razor blade in hand and carefully cutting out the parts so not to slice off my finger in the process, my modeling future had begun.
Those days—although I never realized it—were the beginning of the subliminal training ground for designing what would be a scratch-built model. I was absorbing all of the elements that previous designers and kit producers incorporated into the models that I had built and flown.
At some point, it crossed my mind, "Why do I always need a kit in a box with plans and a step-by-step assembly manual to build my next project?" To that end, I boldly struck out to design and build a model of my very own design.
I was approximately 10 years old with many Comet and Guillow’s stick-and-tissue endeavors under my belt. Some turned out good, and some were not so good, but all were valuable learning experiences. I was ready to design my own!
With a large sheet of white butcher paper from the meat section at the local grocery, I taped this clean slate to the linoleum kitchen floor and began the task of putting what I thought was my aeronautical vision onto paper. That was my introduction to the design phase of my scratch-building journey, one that continues to this day some 60 years later.
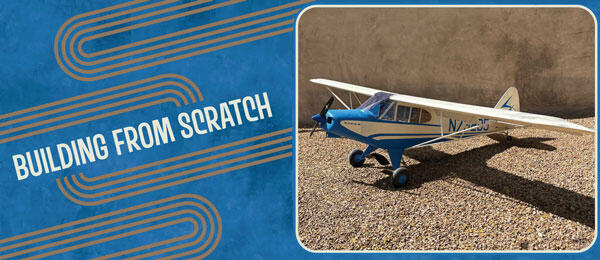
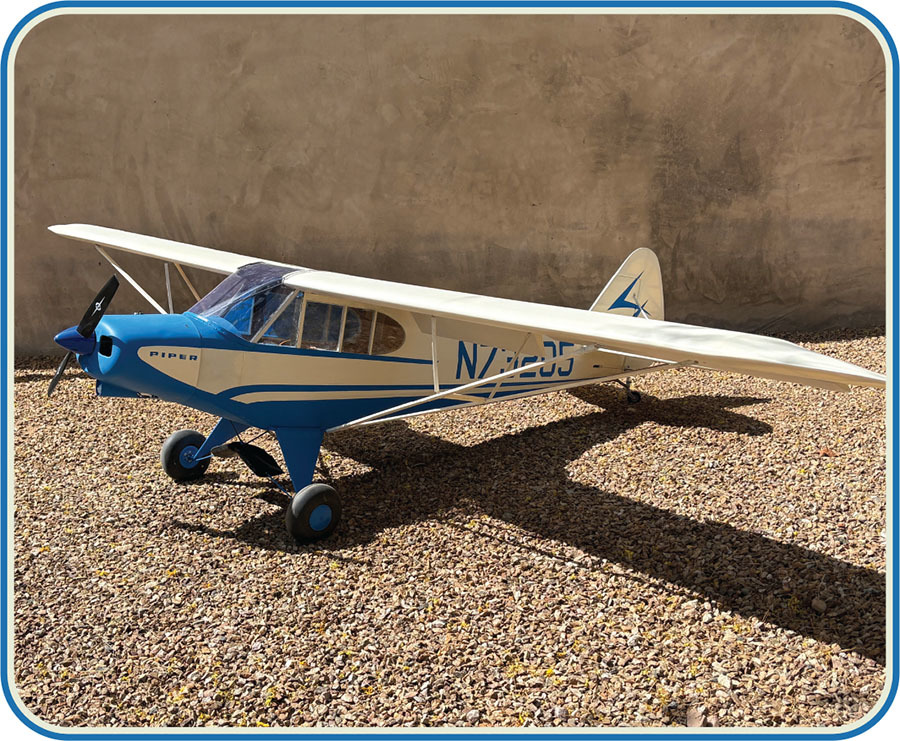
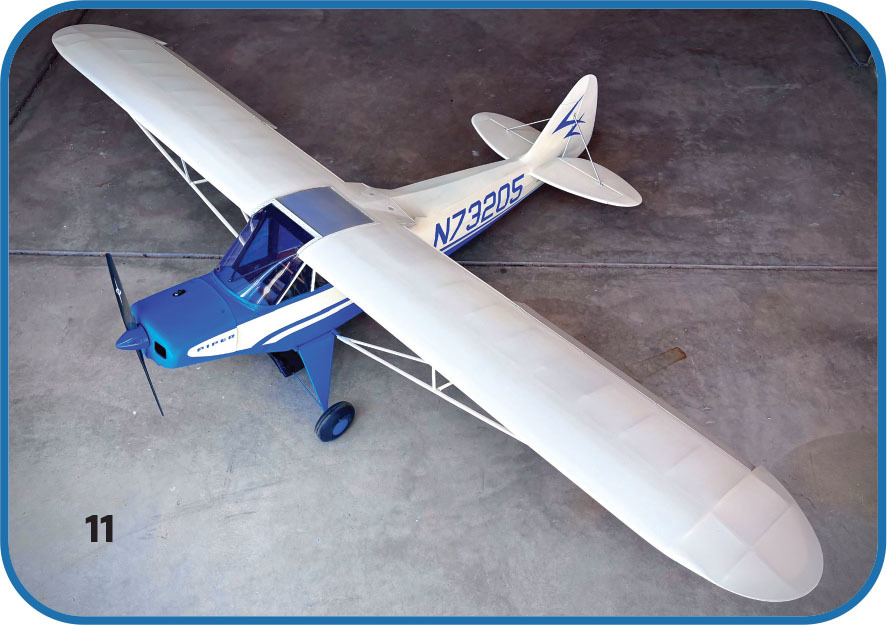
There is absolutely nothing wrong with building models from kits. We have all done plenty of that, and I’m sure all have been an absolute delight. However, if you have been around this hobby long enough, I guarantee that there is a model airplane that you want to build where a kit, the wingspan, or features you want to include, just do not exist. This was where my desire to build a Piper Super Cub entered the picture.
Why a Super Cub? That’s a fair question. The Super Cub subject has been kicking around in my head for many years.
When I was about 12 years old, I would ride my bicycle to the local airport. One day, as I sat watching a guy shoot grass strip landings, he motioned for me to come over as he turned around to head to the upwind end of the runway for another lap. He asked if I wanted to join him. "Well, heck yeah" was my reply! From that day, the white with forest greentrimmed Super Cub has held a special place.
Fast-forwarding to the present day, I was ready to fulfill a build of this 20-plus-years on-and-off obsession. I looked for a kit but couldn’t find one that was the size I envisioned. I’m not saying that one didn’t exist; I just couldn’t seem to find it and I really didn’t look too terribly hard. With my kit search checked off, I began to think of scratch-building my own.
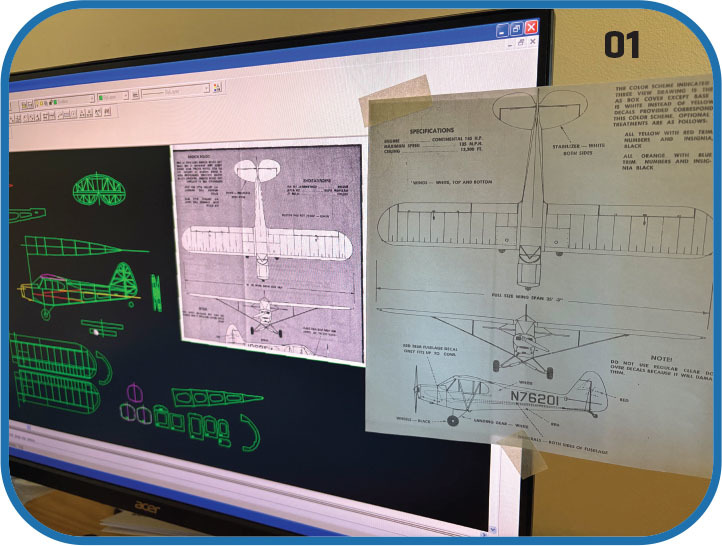
Armed with a factory three-view drawing of the Super Cub, I scanned the image and imported it onto my computer screen. Using a CAD program, I traced the outline. In the "old days" before CAD, I would have actually measured and drawn the outline on an old-fashioned drafting board. How did we manage back then in those dark ages?
Anyway, back to the subject at hand. With the outline in place, it was time to actually begin the "design" phase. It involved filling in the outline with parts that would provide the structural integrity of the finished flying model. This is where all of the kit-building experience paid off. Even way back to the rubber-powered stick models that we painstakingly glued together and covered with flimsy tissue, there are lessons that are incorporated into our creations.
I would like to mention that not all scratch-building is confined to Scale subjects. Many of you might have a design in mind that was never a full-scale, human-carrying, heavier-than-air subject. You might have an idea for a triplane pusher canard with retractable pontoon wingtips. I’m pretty sure that you will not find any manufacturer that has spent much time developing a kit for that, so this would be a great place to spread your scratch-building wings.
Part of the satisfaction and enjoyment is just thinking about how to make it all work. The many elements that go into the logistical implementation are a huge segment of scratch-building your design. The frosting on the aeronautical cake is seeing whether it all works like you envisioned.
Enough about inspiration. Let’s get down to some of the options of building a model from scratch.
Once the outline is determined, the next consideration is the size. On my Super Cub, I wanted the wingspan to be at least 80 inches. The wingspan on the full-scale Super Cub is 35 feet, 2.5 inches. I divided that by 5 to get 84.5 inches, which was right in the ballpark.
Scaling my CAD drawing was a simple keystroke operation and voilà—1/5 scale. Amazing! Now that my outline was the size that the model would be, it was time to consider whether the whole model would be scale.
Past experience forced me to consider whether the horizontal stabilizer and elevators should be a tiny bit larger to ensure more-effective flight characteristics but not too big to distort the proportions of the assembled model. This is where doing a little research is an advantage to building all of those kits that I mentioned.
Go to one of your favorite kit models and do some calculations. Measure the area of the wing and stabilizer/elevator and see what percentage of the wing that the stabilizer/elevator actually is. The point is to become aware of the many parameters that have been integrated into the kit design performance.
This is one of many areas that you might want to look into. Do a bit of research and investigate some of the details that the kits have already considered. One of the many benefits of scratch-building your own design is that it is such a great learning opportunity.
Take the time to think about how the many combinations of details can have a significant effect on how the model performs. It is important to be able to see a bigger picture and, at the same time, visualize how those tiny items contribute to the overall satisfaction of the scratch-building process.
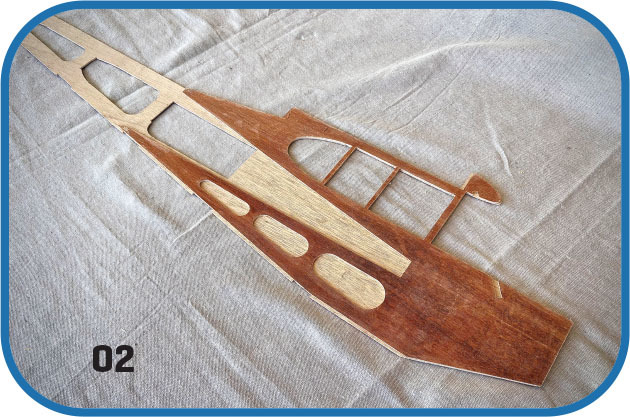
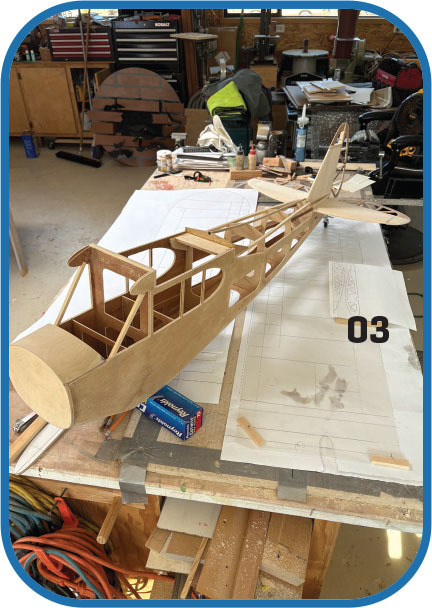
Let’s talk a bit about the structure of the project. Now that you have locked in the three-view outline, it’s time to fill it in with the parts. Stop here and take a closer look at the side view of the fuselage. Starting at the very front and moving along to the very back, try to imagine the distance as one fluid length. By that, I mean designing the structure as a collection of transitions.
For example, the fuselage sides will need doublers, where more strength is required near the front and around the wing saddle. Try to focus on how to transition through those areas and avoid creating stress concentrations.
Try to see how the space between the trailing edge of the wing and the leading edge of the horizontal stabilizer provides a place to flow the structure from one area to another—kind of like merging onto an expressway, slowly accelerating to highway speed. Not a bad metaphor for life, come to think of it.
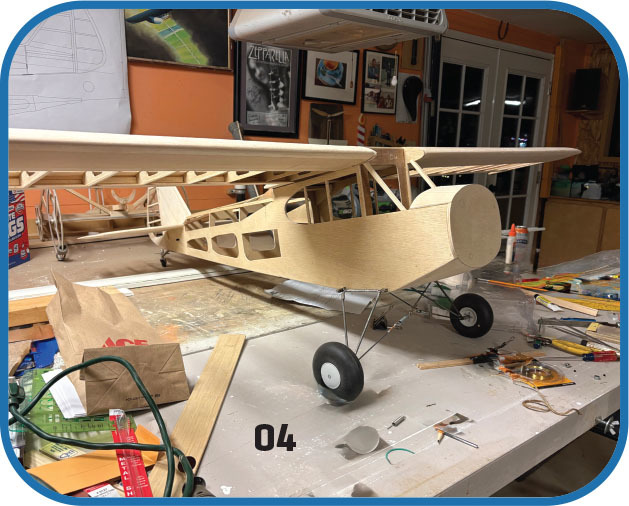
This experience offers other elements of construction that you might encounter. On my Super Cub project, it required making the landing gear and the cowling from scratch.

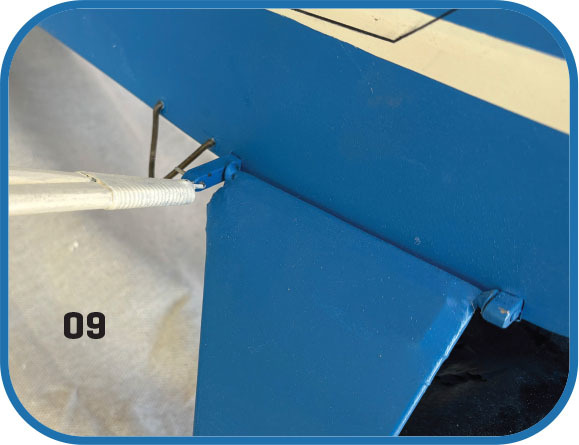
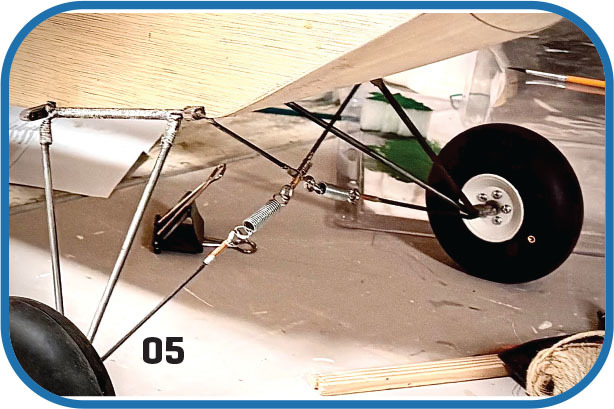
Let’s examine the landing gear. First, it had to be strong enough to support a model that would weigh between 6 to 8 pounds without deflecting. How could I mount it to the fuselage, build up the area where it attaches, and make it robust enough for a hard landing without the need to rebuild? What about suspension? Again, many considerations were necessary to see the big picture through the details.
Like the full-scale Super Cub, I chose to make a spring suspension. I decided to mount each side of the landing gear to two 1/4-inch custom-cut and drilled square steel bars that attached to the bottom of the fuselage. Both bars provided the pivot that each side of the gear needed, as well as a secure mount for the fuselage side of the wing strut. This again highlights how the scratch-built model provides a platform to show the many areas that are integral to the design of the whole model.
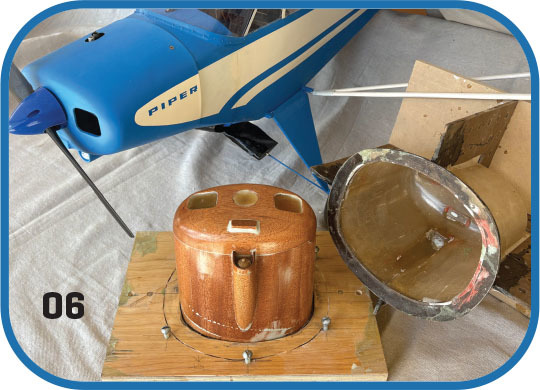
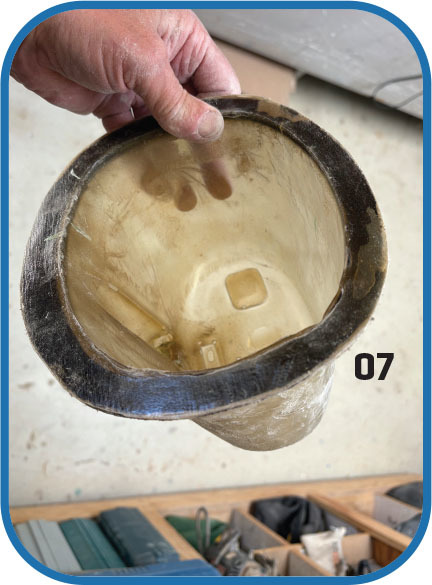
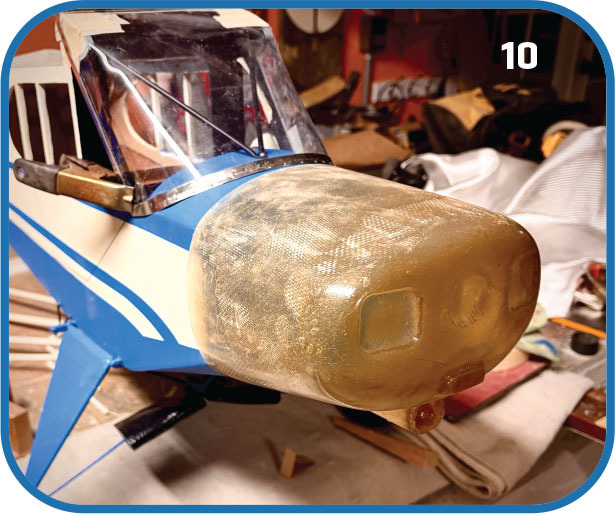
Oh, I didn’t forget about the cowling. This might be viewed as a separate project. I understand that I just spoke about how everything should be viewed as integral, but there are exceptions, and the cowling is one of them. It is a removable part and can be made in a few ways. I chose to make it out of fiberglass.
Here again is another opportunity to dabble in an area that might be a new experience. With the internet at most everyone’s access, it’s easy to watch instructional videos that other model builders have produced. I have referenced these videos many times, and they are a huge help in avoiding the many pitfalls that I otherwise would have dropped into.
As I mentioned, I chose to make a fiberglass cowling. I carved a pattern, cast a mold over the pattern, and cast the actual part from the mold. It took some thinking ahead because it had been many years since I had worked with fiberglass cloth, mold release agents, and resin, but it came out pretty good, and I learned a lot.
I considered making a metal cowling for a moment. Because the Super Cub model’s cowling is straightforward and the fullscale Super Cub has one that is metal, I started thinking about how I could fabricate a hammered-out front piece and attach it to a simple, flat, metal-wrapped aft part. I did take the time to experiment with making a front piece form and hammering a thin piece of steel sheet over it.
In the end, it just wasn’t what I wanted, but because it was a scratch-building project, I could try something outside of the conventional box and learn a little at the same time. Who knows? Maybe someday I will revisit this metal-forming process for another project.
Scratch-building lends itself to thinking about options in different ways and using different materials and processes. Speaking of different processes, with the popularity and easy access to 3D printing these days, maybe a printed cowling is the way to go! This is yet another technology to incorporate into your scratch-building adventure.
Finishing the model offered an opportunity to dip my toes into another area. I wanted the texture of the covering to resemble the full-scale subject. I had to research what was out there in the manufacturing world. The more common way to cover a model these days is with heat-shrink plastic films, but I wanted to replicate the real deal.
I wanted a more textured, paintable finish. Here, again, my covering desire forced me to do the research. This covering exercise led me to what paint to use, which was another research area that I was unfamiliar with. Working out a way to stencil the tall "N" number on each side of the fuselage was another testing example. I learned so much doing these things!
Building a model from scratch is such an enjoyable experience. The clean slate that is presented with each new project opens up so many areas that contribute to the finished product. I have always been more interested in the design and build parts of modeling, and not so much the flying segment of this hobby. Although all phases play an important role, flying your scratch-built model offers a true test of how all of the elements of your creation work together. Scratchbuilding a model is application learning at its finest and, at the same time, it produces a hands-on, brain-stimulating result. I ask you, what could be better?
For your next model, it might be time to look beyond a kit or a foam ARF to a subject that grew out of your imagination or to an existing full-scale inspiration. Whatever the choice, I guarantee that the results will yield much enjoyment, satisfaction, and a wider knowledge of this great hobby. Now go get ‘em, tiger!


Comments
Add new comment